
SiteWhere on Amazon EC2
Amazon’s Elastic Compute Cloud (EC2) provides an environnment for running virtual servers in the cloud. Server images are offered in the form of Amazon Machine Images (AMIs) which capture the state of a configured server so it can be started in the cloud as a virtual machine.
Signing up for AWS/EC2
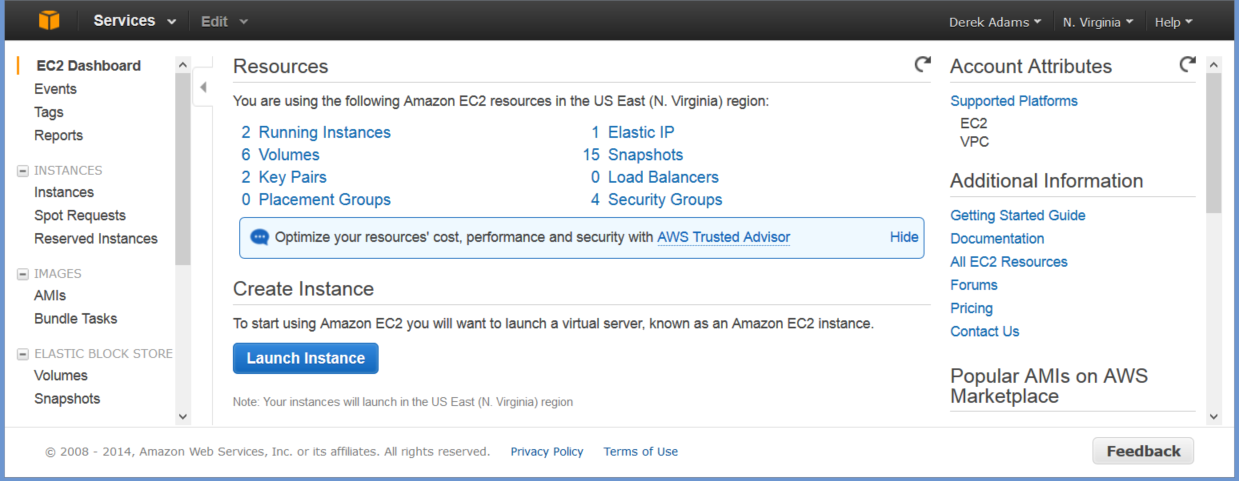
If you do not already have an Amazon AWS account, you will need to create one in order to launch VMs in the cloud. Amazon virtual machines are not free, but they are also not very expensive if you don't leave them running continuously. To create an account, navigate to Amazon AWS Homepage and create a new account. Make sure that your account allows access to EC2. Once you have signed up for an account you should be able to navigate to the AWS Console. Click on the EC2 link and the EC2 dashboard should open. It will look something like the image below:
Finding a SiteWhere AMI
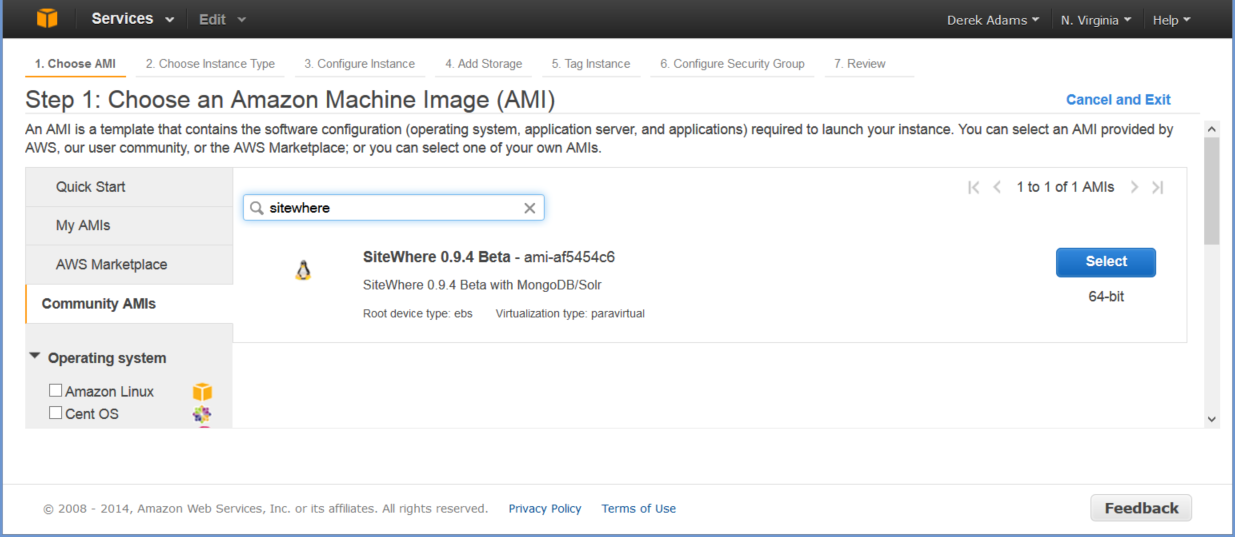
Each version of SiteWhere has a separate AMI that includes a fully functional system that is ready to go on bootup. To start your own instance of SiteWhere on EC2, you will first need to find an AMI for the version of SiteWhere you want to run. First click on the Launch Instance button on the dashboard which will open a wizard for launching a new EC2 instance based on an AMI. Click on the Community AMIs tab at the left and type SiteWhere into the search box and press enter. All public SiteWhere instances will show up in the list as shown below:
Launching an Instance
After locating a suitable image, the next step is to launch an instance of the image into the Amazon cloud.
Choose an Instance Type
Click the Select button next to the version of SiteWhere you want to run. The wizard will move to the next step which is to select the instance type. Click on the General Purpose tab on the left to get a list of instance types. More powerful instances cost more money, so you will probably want to use medium or large instance to run your server. Performance will be noticeably better with more powerful instances.
Amazon offers a free tier which allows you to run a Micro instance for a period of time. The default memory configuration for SiteWhere exceeds the specifications of a micro instance, so a larger instance size should be preferred.

Configure a Security Group
After choosing the instance type, continue clicking Next until you get to the Configure Security Group step. This step sets up the inbound firewall so that you can access the instance externally. We need to add a few extra rules so external clients can access HTTP, MQTT, and Hazelcast. There is already a rule for SSH, so we just need to open up the following ports:
Port 80
Allows instance to serve HTTP.
Port 1883
Allows standard MQTT clients to connect to the internal HiveMQ instance.
Port 5701
Allows Hazelcast clients to connect to subscribe to event topics.
Port 61623
Allows web sockets to connect to HiveMQ for MQTT from the browser.
You can add each of the rules by clicking on the Add Rule button, leaving the dropdown selection as Custom TCP Rule, and entering the port number in the Port Range textbox. Choose Anywhere from the Source dropdown. After entering all of the rules, you should have a page that looks like below:
Once you have entered the details for a security group, they are saved for reuse. When you start another instance you can just choose the group by name rather than entering the ports by hand again.

Launch the Instance
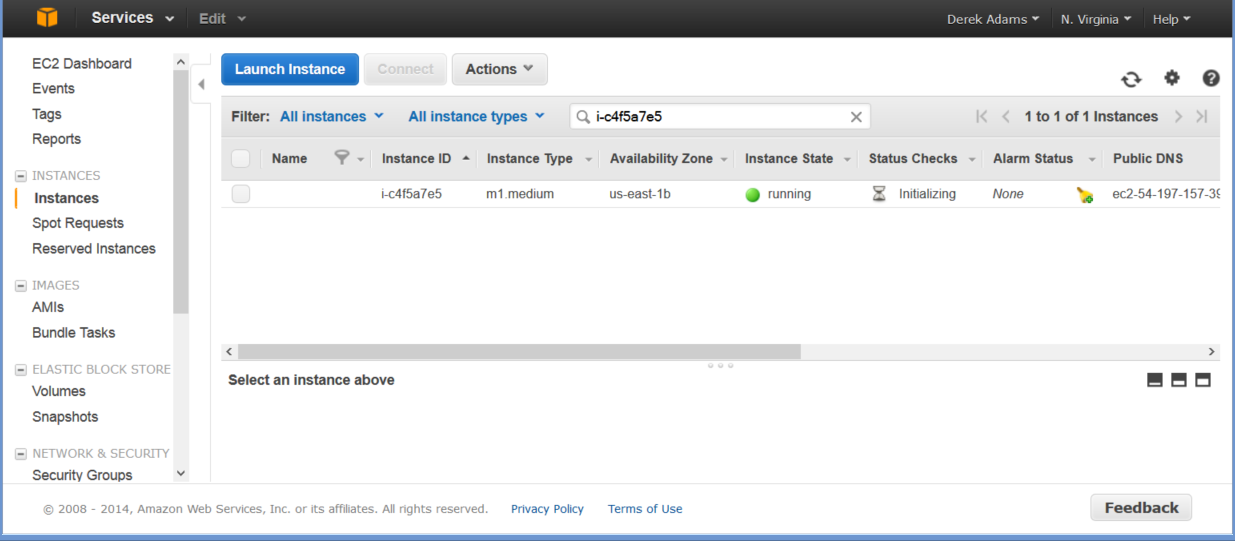
Now click the Review and Launch button, verify the information, and click Launch to let Amazon start the instance in the background. Before launching, the wizard will ask you to select an existing key pair or create a new one. Choose to create a new key pair (unless you previously created one), enter a name, then click Download Key Pair to download the private key to your local machine. This key will be used in logging in to the running instance later. Click Launch Instances to complete the process. If the launch was successful, you should soon see the instance running under your instances list in the control panel as shown below:
Working with Your SiteWhere Instance
You should now have a working SiteWhere instance running! The first thing to do is test to make sure we can access the instance. Rather than access the instance directly by it’s IP address, it is easier to map the IP to a name in our local computer’s hosts file. On unix, you can edit /etc/hosts and add an entry for sitewhere-aws mapped to the public IP address of the instance (the public IP is listed on the screen above if you scroll to the right). The process is the same on windows, but the file is located in the C:\Windows\System32\drivers\etc directory. After adding the host, you should be able to access the SiteWhere Administrative Console application at:
http://sitewhere-aws/sitewhere/admin/
If the page doesn’t load, the server is probably not running. Make sure it shows up with an Instance State of running (with a green indicator) in the instances panel. If you are able to access the admin UI, the server should be ready to go. The admin login page should look similar to the one below:

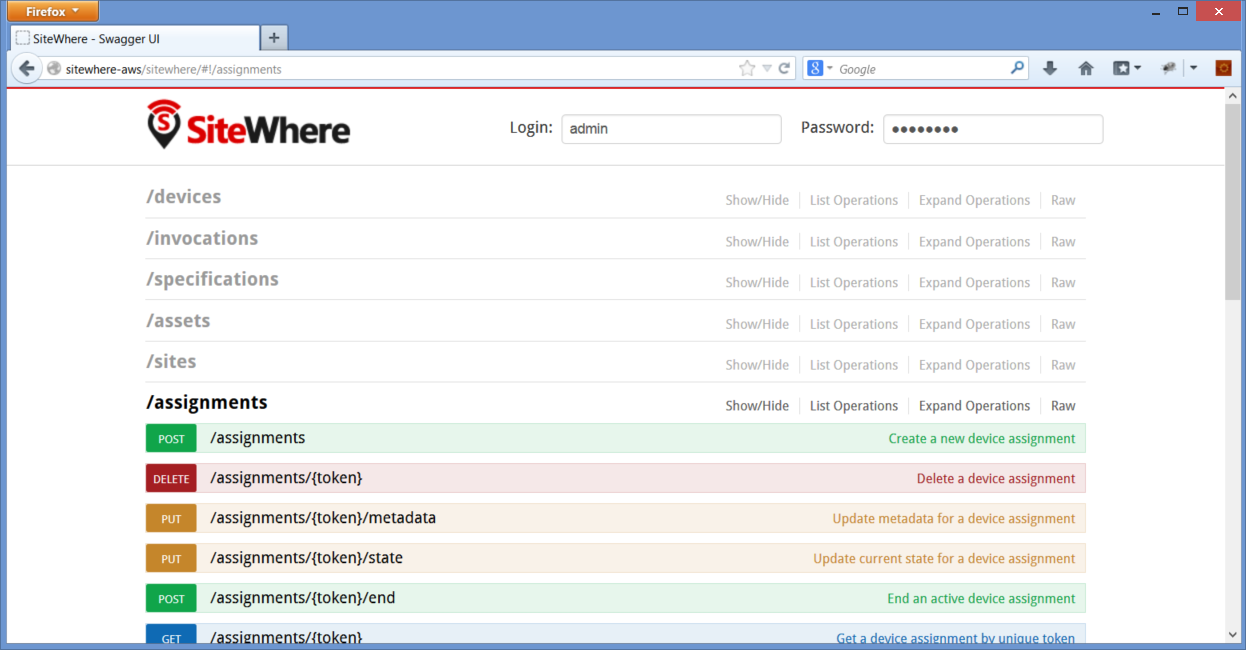
Viewing Swagger for REST APIs
The SiteWhere server comes with Swagger installed to allow you to interact with the SiteWhere REST services. Enter the following URL:
http://sitewhere-aws/sitewhere/
and the Swagger user interface should load in the browser as shown below:
Viewing Documentation
Documentation for the version of SiteWhere installed on the cloud instance is available at the root of the server. You can access it via the following URL:
http://sitewhere-aws/
Logging in via SSH
In order to configure your cloud instance beyond the default setup, you will need to log in via SSH. Amazon has a nice overview of how to do exactly that here:
The Unix username for logging in to the instance is admin and the authentication uses the public key associated when the instance was launched. If you assigned a pass phrase when creating the key, your client may ask for the phrase on login.
Now that you can connect to your cloud instance, the first thing to do is obtain root access so you can crash it! To swap to root privileges enter:
sudo -iYou will need to be logged in as root to do things like update configurations and restart SiteWhere.
Starting and Stopping SiteWhere
If you make changes to the SiteWhere configuration files or otherwise have need to restart the SiteWhere server, you can do so without having to restart the entire cloud instance. From an SSH prompt (with root) type:
/etc/init.d/sitewhere startto start the SiteWhere server. To shut it down, type:
/etc/init.d/sitewhere stopViewing the SiteWhere Log File
The SiteWhere log file (Log4j output) can be ‘tailed’ to the terminal by executing the command:
tail -f /opt/sitewhere/logs/catalina.outSetting Up Hazelcast Public Address
If you are using external tools that require Hazelcast (such as Mule), you must make an update to the default configuration and restart SiteWhere.
By default, the Amazon EC2 instance does not know its public IP address and instead sends its internal address when Hazelcast clients try to connect. This is a bad thing. To fix the problem, locate the public IP address in the EC2 control panel (the same address you have mapped to sitewhere-aws in your hosts file). Open the Hazelcast configuration for SiteWhere:
vi /opt/sitewhere/conf/sitewhere/hazelcast.xmlIn the network section, there is a public-address entry. Replace the address already there with your public IP address. Save your changes and restart SiteWhere as explained above. You should now be able to connect via Hazelcast.