Android Integration
SiteWhere supports rich integration with Google’s Android platform including full round-trip device interactions over MQTT. The SiteWhere Android libraries include a sample wizard for setting up connectivity by establishing a remote SiteWhere server and MQTT broker to use.
Locating SiteWhere Android Libraries
The SiteWhere Android libraries are available on GitHub and have been released under the following path:
Android in SiteWhere is divided into three separate projects:
SiteWhereFrameworkLibrary
Library with base framework code for creating a SiteWhere Android application. It contains the base interfaces and implementations that provide an abstracted view of SiteWhere interactions.
SiteWhereMQTTLibrary
Library with code specific to communicating with SiteWhere over MQTT. It uses the Fuse MQTT Client as a means to interact with an MQTT broker, sending and receiving SiteWhere messages. It also contains the base connectivity wizard which provides an interface for configuring the remote SiteWhere host and MQTT broker information.
SiteWhereExample
An Android application project that uses the other two library projects to create a sample application that sends sensor data to SiteWhere. It provides an example of using the other libraries to create an application with a connectivity setup wizard, dynamic device registration, and event reporting based on real-time sensor readings.
Make sure that you are using a version of the libraries that is compatible with your SiteWhere instance. The master branch always contains the latest stable code, but there is a branch in the repository for each corresponding SiteWhere release.
Introduction to Framework Concepts
When the Android application starts, a main activity is launched to present an interface to the user. The SiteWhere libraries provide classes that extend the base Android Activity class and allow you to inherit many of the core interactions that a connected device needs to communicate with SiteWhere.
Base Activities
Currently, there are two base classes that provide different levels of functionality:
SiteWhereActivity
Contains the base logic for connecting to an underlying message service (defaulting to MQTT) in order to send events to and receive commands from SiteWhere. This class only deals in sending binary data between the application and SiteWhere, so it will not work out-of-the-box since SiteWhere defaults to using messages encoded with Google Protocol Buffers. This base class is useful for implementing custom protocols between an Android application and SiteWhere.
SiteWhereProtobufActivity
Extends functionality from SiteWhereActivity to include support for encoding/decoding messages using the standard SiteWhere proto file. This base class offers methods that wrap common SiteWhere actions such as sending events to the server and receiving commands from the server. It also has basic support for round-trip self registration. Most applications will use this base class unless they need to implement their own encoding scheme for messages.
Communication Services
Note that, rather than directly referencing protocol specifics in the base activities, the framework instead defers to talking to a Service via interfaces. This adds a level of indirection that allows the messaging layer to be swapped without affecting the application code. The default service implementation is:
MqttService
Provides connectivity to SiteWhere via an MQTT broker by using the Fuse MQTT Client over a TCP/IP connection. Connectivity parameters for the MqttService are provided by a configuration object that is passed to the Intent used to start the service. The SiteWhere example application detects whether the configuration has been set and, in cases where it is missing, displays a connectivity wizard to set and verify the values. The service automatically handles reconnecting if the network becomes inaccessible and provides hooks for notifying the parent application when SiteWhere connectivity changes. It is important to note that, since the MQTT functionality is running as a service, the connection to SiteWhere remains in place even when the application that started it is not running. The periodic keep-alive ping messages sent from client to MQTT broker have been configured to be sent infrequently to allow the network hardware on the device to conserve power.
The MQTT library requires network access, so make sure to add the necessary permissions. The Android manifest shown later in the document provides an example of doing this.
Create a SiteWhere Android Project
If you have not already done so, download and install the Android ADT Bundle which includes the Android Eclipse development environment and SDK. The Android documentation includes detailed instructions on getting your development environment installed and configured for developing applications.
Create Project Using New Project Wizard
Once the development environment is installed, a new project should be created for your SiteWhere Android application. Click File > New > Android Application Project to open the New Android Application wizard as shown below:
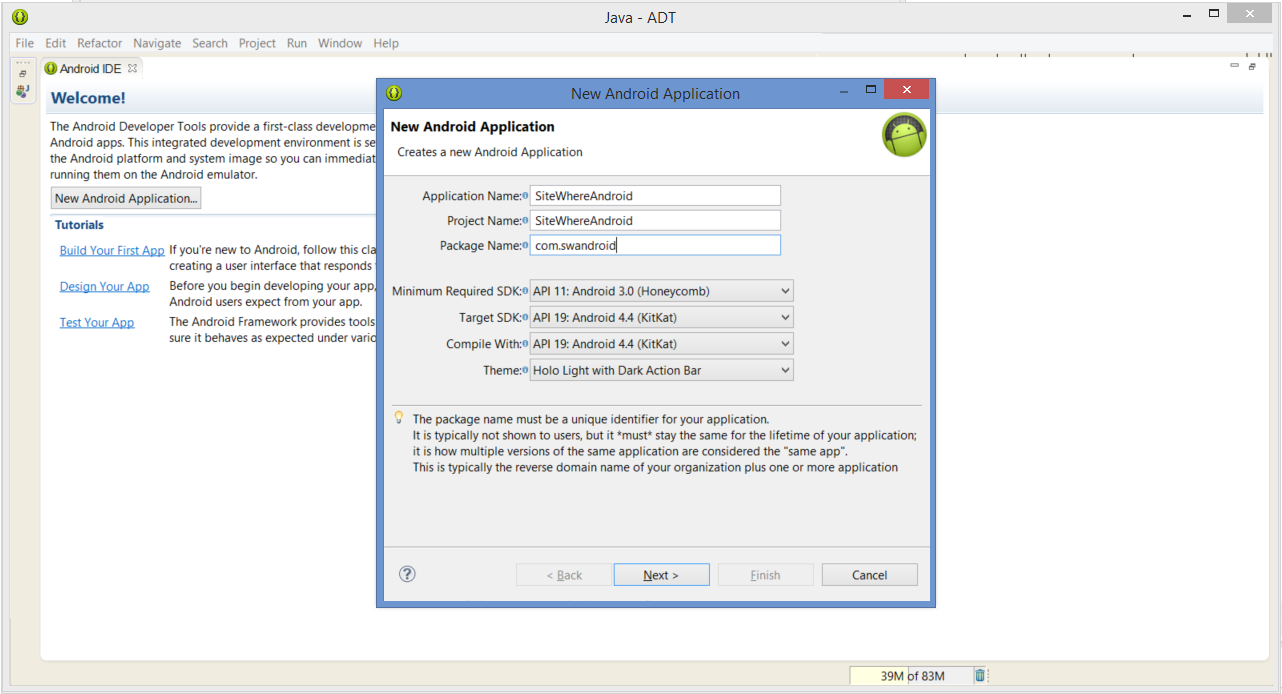
Enter a project name and package name for your application, then choose the other settings as appropriate for your application and click Next.
The minimum required SDK for SiteWhere Android libraries is API 11: Android 3.0 (Honeycomb). The intent is to release future versions to support compatibility with older runtimes when time allows.
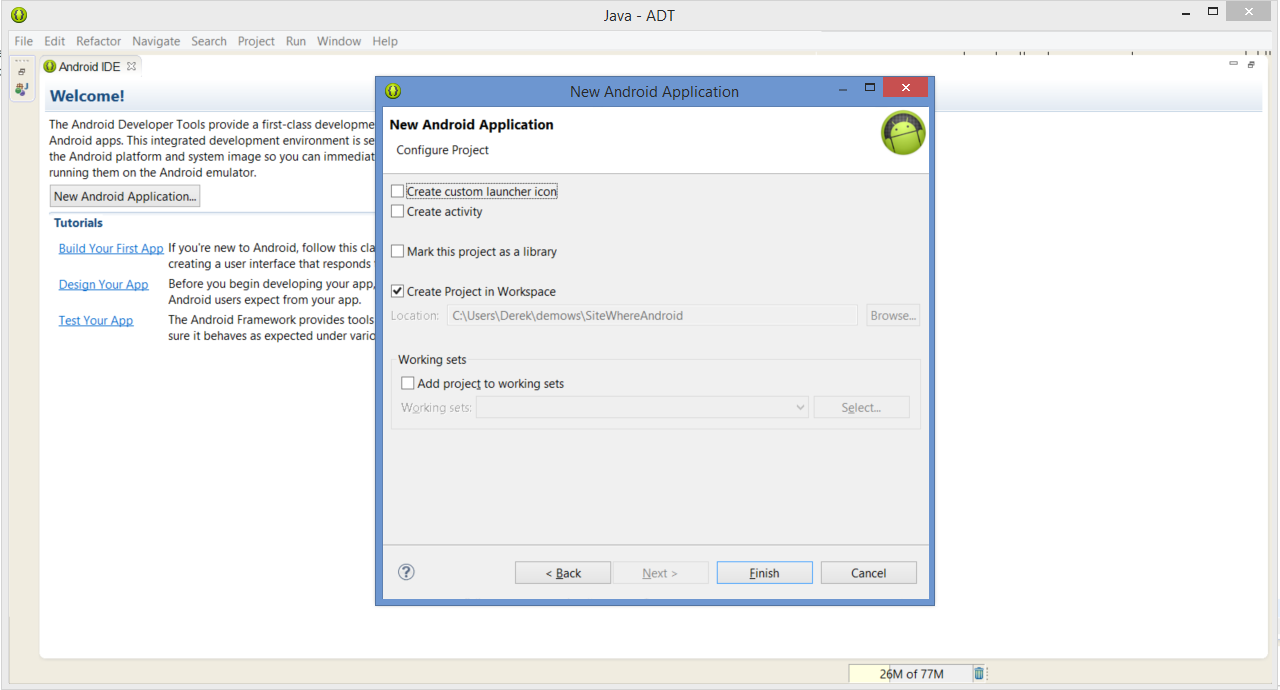
On the next page of the wizard, uncheck the Create custom launcher icon and Create activity checkboxes.
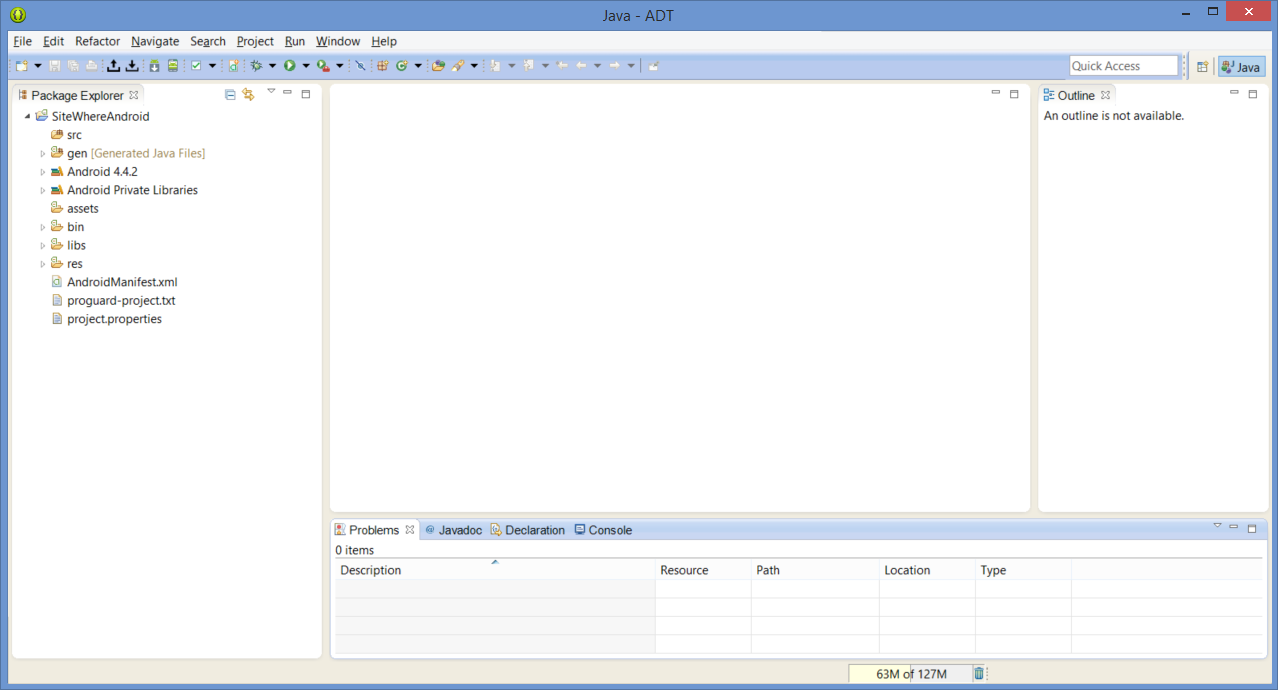
Click Finish to create the new application. The Eclipse workspace should show the Java perspective with the newly created project displayed in the Package Explorer pane. You may have to close the welcome screen or manually change over to the Java perspective. The screen should look like the one below:
Import SiteWhere Libraries from GitHub
The SiteWhere GitHub repositiory includes library projects that provide a framework for building Android applications. By importing the projects into your application, the majority of the interactions with SiteWhere are taken care of so you can focus on the core application code. To import the SiteWhere Android library projects:
- Click Import > Git > Projects from Git. Click Next.
- In the Select Repository Source panel, choose Clone URI. Click Next.
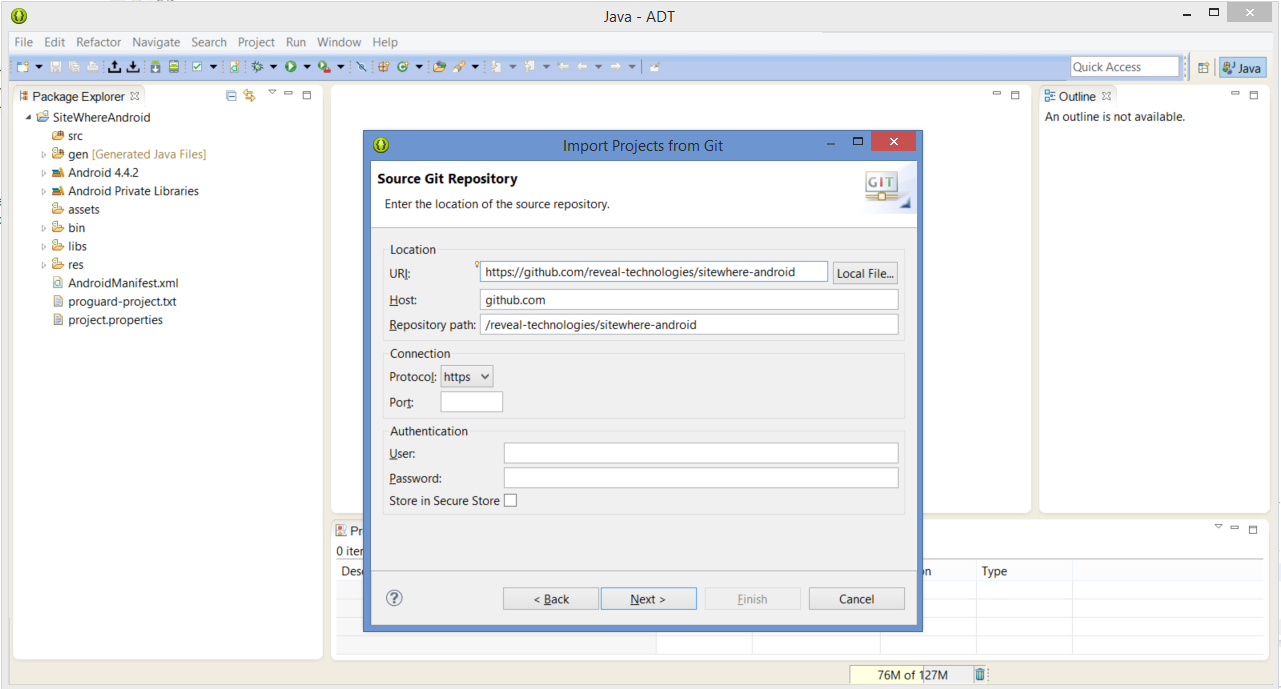
- In the Source Git Respository panel, enter the following URL:
https://github.com/sitewhere/sitewhere-android-sdk
The user interface should automatically fill in the other fields based on the URL as shown below:
- Click Next to continue and choose which branches you want to check out. The best choice is the branch that is the exact match for the SiteWhere instance it will be communicating with. Higher numbered branches should be backward compatible with older SiteWhere servers.
- Click Next to move to the next step in the wizard, the Local Destination panel. You can usually leave the destination values as the defaults unless you have a different location you would rather store the imported repository.
- Click Next to move to the next step in the wizard, where you will choose how to import the Eclipse projects contained in the repository.
- Choose Import existing projects, using the default Working Directory (which should be the location specified in the Local Destination panel).
- Click Next to move to the Import Projects panel.
- Choose to import the projects that end with Library as shown below:

- Click Finish to import the projects into your local Eclipse workspace.
Reference SiteWhere Libraries from New Project
In order to use the SiteWhere Android libraries, your new project must include the libraries on its classpath. Open the properties for the project you created earlier in Package Explorer and choose Android in the list of sections on the left. At the bottom of the panel in the Library group, click the Add button to add references to the SiteWhere libraries as shown below:
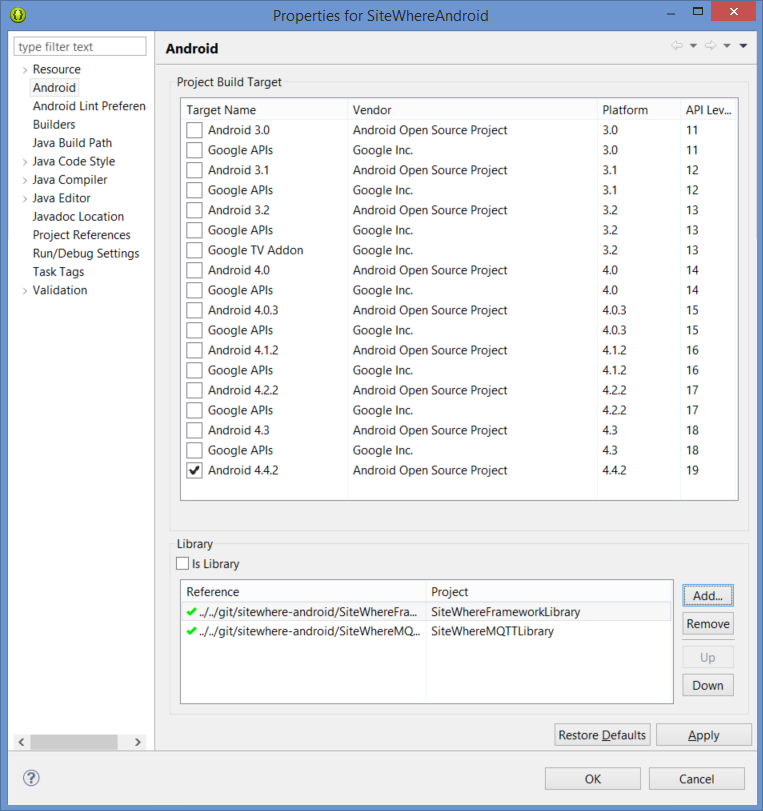
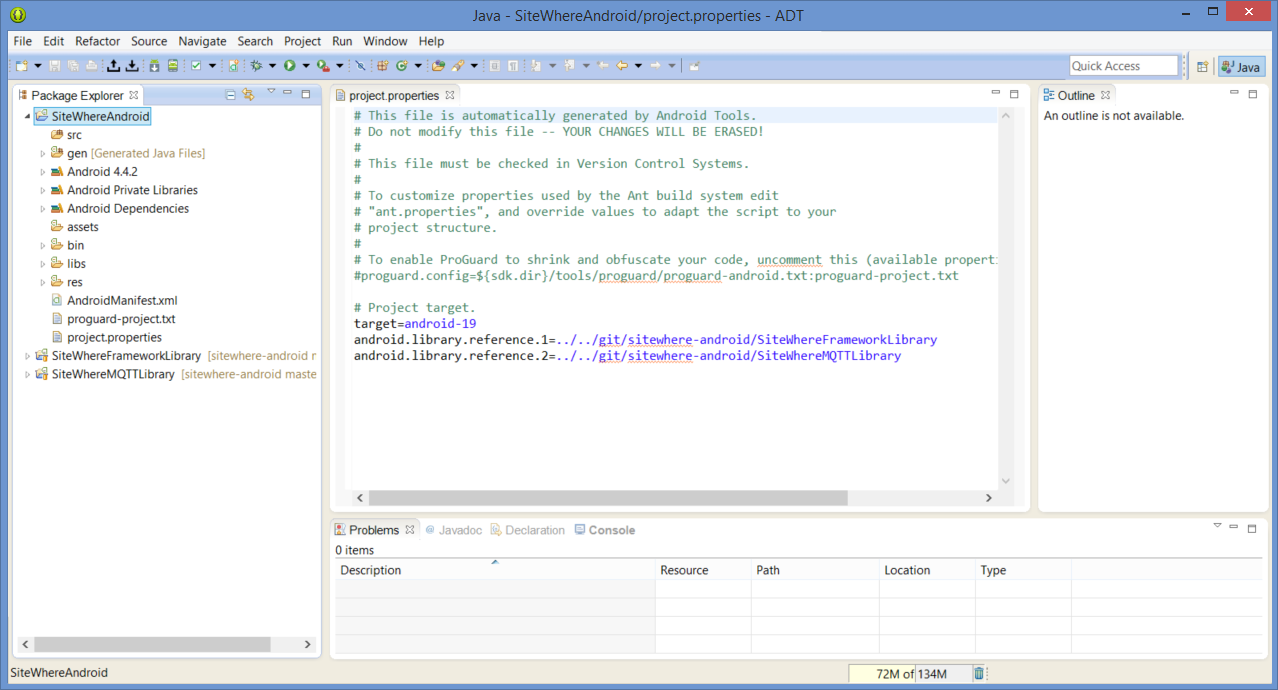
Click OK to apply the changes and your resulting workspace should look something like the image below. Note that if you open the project.properties file, there are now references to the SiteWhere libraries.
With the projects added, the SiteWhere Android framework elements may be used in your project.
Build the Android Application
Building a SiteWhere application is straightforward since most of the low-level details are taken care of by the framework. Start by creating a base Java package for the code by clicking the src folder and choosing New > Package from the menu. The package name should be the same as the one specified when creating the project.
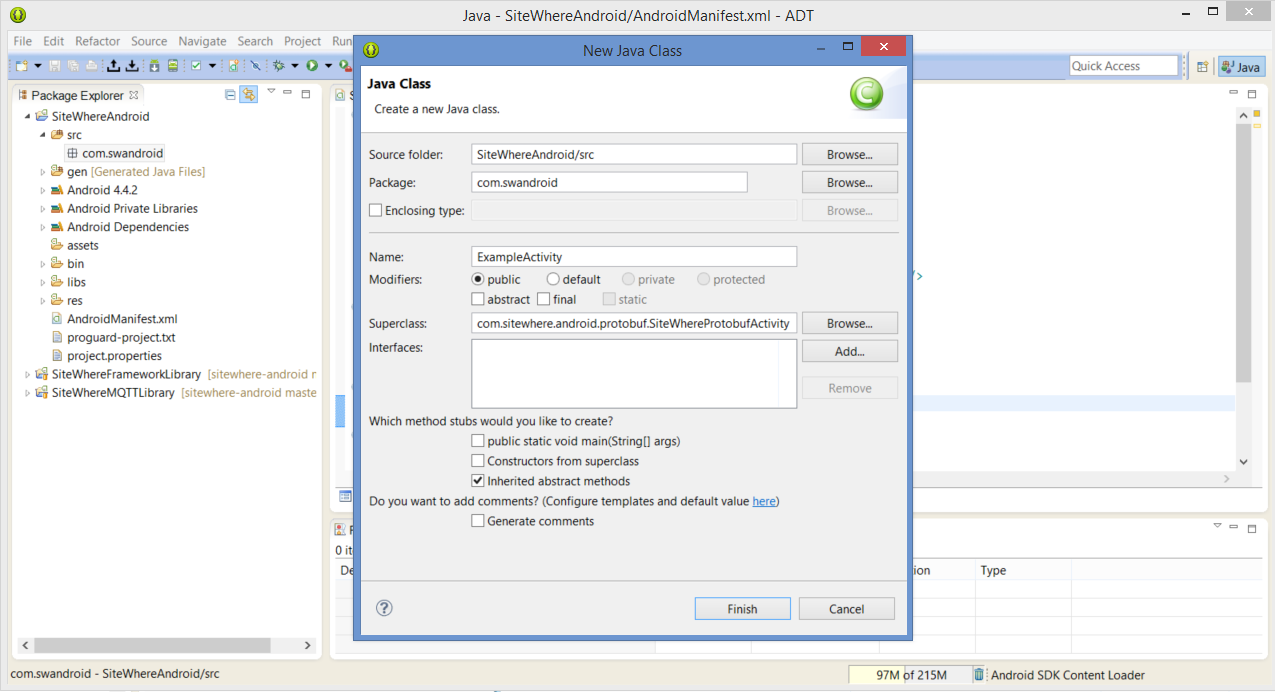
Create a Main Activity
Next, create the main activity that will be displayed when the application starts. For this example, the activity will extend SiteWhereProtobufActivity so that it works with the default SiteWhere configuration.
Add Code for Connecting to SiteWhere
Once the activity has been created, very little code is required to get a basic application up and running. The code below illustrates a simple activity that connects to SiteWhere over MQTT and registers the device for sending events and receiving commands. Note that most of the heavy lifting is taken care of by the framework.
package com.swandroid;

import android.app.Activity;
import android.app.Service;
import android.os.Bundle;
import android.os.Parcelable;
import android.util.Log;

import com.sitewhere.android.messaging.SiteWhereMessagingException;
import com.sitewhere.android.mqtt.MqttService;
import com.sitewhere.android.mqtt.preferences.MqttServicePreferences;
import com.sitewhere.android.protobuf.SiteWhereProtobufActivity;
import com.sitewhere.device.provisioning.protobuf.proto.Sitewhere.Device.Header;
import com.sitewhere.device.provisioning.protobuf.proto.Sitewhere.Device.RegistrationAck;

/**
 * Example of {@link Activity} that can communicate with SiteWhere.
 *
 * @author Derek
 */
public class ExampleActivity extends SiteWhereProtobufActivity {

	/** Tag for logging */
	private static final String TAG = "ExampleActivity";

	/*
	 * (non-Javadoc)
	 *
	 * @see android.app.Activity#onCreate(android.os.Bundle)
	 */
	protected void onCreate(Bundle savedInstanceState) {
		super.onCreate(savedInstanceState);
		setContentView(R.layout.main);

		// Manually set up MQTT information.

		MqttServicePreferences mqtt = new MqttServicePreferences();
		mqtt.setBrokerHostname("54.237.72.168");
		mqtt.setBrokerPort(1883);
		mqtt.setDeviceHardwareId(getUniqueDeviceId());
		MqttServicePreferences.update(mqtt, this);
	}

	/*
	 * (non-Javadoc)
	 *
	 * @see com.sitewhere.android.SiteWhereActivity#getServiceClass()
	 */
	@Override
	protected Class<? extends Service> getServiceClass() {
		return MqttService.class;
	}

	/*
	 * (non-Javadoc)
	 *
	 * @see com.sitewhere.android.SiteWhereActivity#getServiceConfiguration()
	 */
	@Override
	protected Parcelable getServiceConfiguration() {
		return MqttServicePreferences.read(this);
	}

	/*
	 * (non-Javadoc)
	 *
	 * @see android.app.Activity#onResume()
	 */
	@Override
	protected void onResume() {
		Log.d(TAG, "About to connect to SiteWhere.");
		connectToSiteWhere();
		super.onResume();
	}

	/*
	 * (non-Javadoc)
	 *
	 * @see android.app.Activity#onPause()
	 */
	@Override
	protected void onPause() {
		Log.d(TAG, "About to disconnect from SiteWhere.");
		disconnectFromSiteWhere();
		super.onPause();
	}

	/*
	 * (non-Javadoc)
	 *
	 * @see com.sitewhere.android.SiteWhereActivity#onConnectedToSiteWhere()
	 */
	@Override
	protected void onConnectedToSiteWhere() {
		Log.d(TAG, "Connected to SiteWhere.");
		try {
			registerDevice(getUniqueDeviceId(), "d2604433-e4eb-419b-97c7-88efe9b2cd41", null);
		} catch (SiteWhereMessagingException e) {
			Log.e(TAG, "Unable to send device registration.", e);
		}
	}

	/*
	 * (non-Javadoc)
	 *
	 * @see
	 * com.sitewhere.android.protobuf.SiteWhereProtobufActivity#handleRegistrationAck(com.sitewhere.device
	 * .provisioning.protobuf.proto.Sitewhere.Device.Header,
	 * com.sitewhere.device.provisioning.protobuf.proto.Sitewhere.Device.RegistrationAck)
	 */
	@Override
	public void handleRegistrationAck(Header header, RegistrationAck ack) {
		switch (ack.getState()) {
		case ALREADY_REGISTERED: {
			Log.d(TAG, "Device was already registered.");
			break;
		}
		case NEW_REGISTRATION: {
			Log.d(TAG, "Device was registered successfully.");
			break;
		}
		case REGISTRATION_ERROR: {
			Log.d(TAG,
					"Error registering device. " + ack.getErrorType().name() + ": " + ack.getErrorMessage());
			break;
		}
		}
	}

	/*
	 * (non-Javadoc)
	 *
	 * @see com.sitewhere.android.SiteWhereActivity#onDisconnectedFromSiteWhere()
	 */
	@Override
	protected void onDisconnectedFromSiteWhere() {
		Log.d(TAG, "Disconnected from SiteWhere.");
	}
}
You will need to update the MQTT broker location (set in the onCreate() method) to point to a publicly available SiteWhere MQTT broker. The easiest method for this is to start up a SiteWhere instance on Amazon EC2 and use the public IP address for the instance as the MQTT broker hostname.
Add Declarations in Android Manifest
To create an application that can be built and executed on a device, a few more artifacts need to be added. The standard AndroidManifest.xml needs to be edited to include the new activity and reference the MQTT service provided by the framework.
<manifest xmlns:android="http://schemas.android.com/apk/res/android"
    package="com.swandroid"
    android:versionCode="1"
    android:versionName="1.0" >

    <uses-sdk
        android:minSdkVersion="11"
        android:targetSdkVersion="19" />

    <uses-permission android:name="android.permission.INTERNET" />
    <uses-permission android:name="android.permission.ACCESS_NETWORK_STATE" />

    <application
        android:allowBackup="true"
        android:icon="@drawable/ic_launcher"
        android:label="@string/app_name"
        android:theme="@style/AppTheme" >
        <activity
            android:name="com.swandroid.ExampleActivity"
            android:label="@string/app_name" >
            <intent-filter>
                <action android:name="android.intent.action.MAIN" />

                <category android:name="android.intent.category.LAUNCHER" />
            </intent-filter>
        </activity>

        <service
            android:name="com.sitewhere.android.mqtt.MqttService"
            android:exported="false" >
        </service>
    </application>

</manifest>
Add Files for Layout and Internationalization
In the res/layout folder, add a file named main.xml with the following content. It provides the layout for the main screen shown in the application.
<FrameLayout xmlns:android="http://schemas.android.com/apk/res/android"
    xmlns:tools="http://schemas.android.com/tools"
    android:id="@+id/container"
    android:layout_width="match_parent"
    android:layout_height="match_parent" >

    <TextView
        android:id="@+id/main_label"
        android:layout_width="wrap_content"
        android:layout_height="wrap_content"
        android:layout_gravity="center_vertical|center_horizontal"
        android:text="@string/main_label"
        android:textSize="24sp"
        android:textStyle="bold" />

</FrameLayout>
In the res/values folder, edit the file named strings.xml and replace it with the following content.
<resources>

    <string name="app_name">SiteWhere Application</string>
    <string name="main_label">SiteWhere Example</string>

</resources>
Run the Application
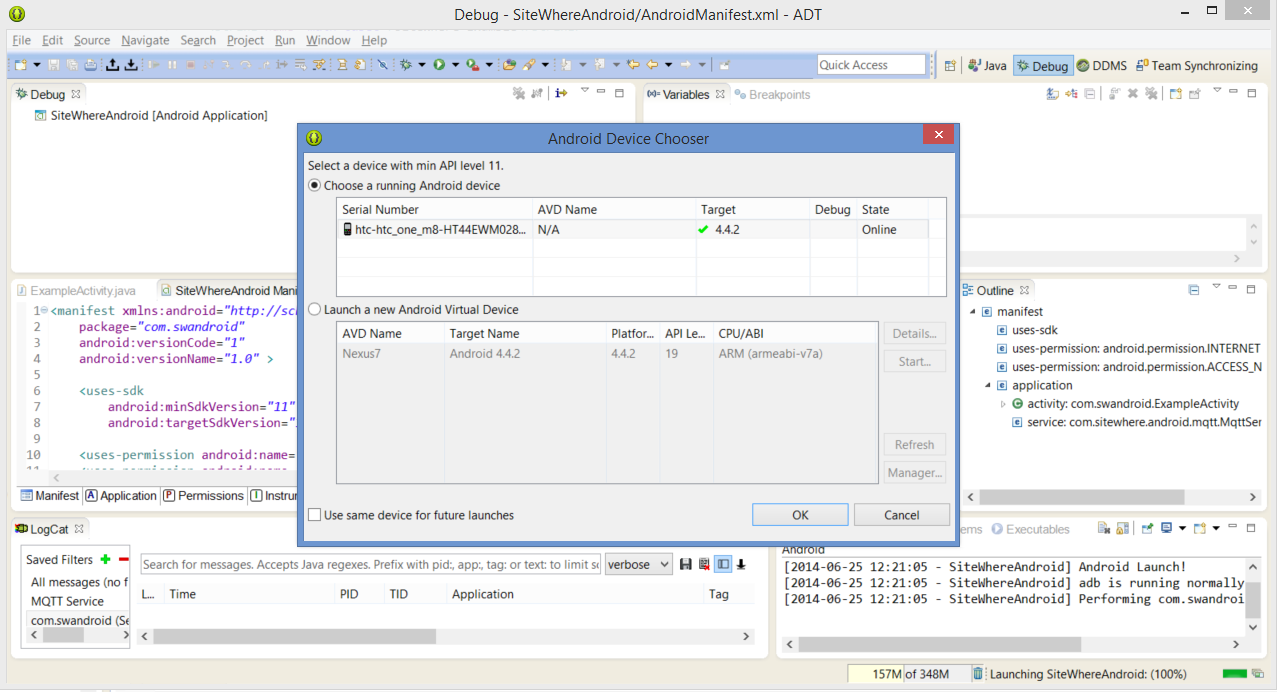
Now that all of the pieces are in place for a basic application, the next step is to execute the code. ADT allows you to execute applications in an emulator or directly on a device. Their developer guide to building in Eclipse gives details on both methods. If you debug the application on a device, you will see output similar to below:
Once the application is running on the device, you can swap to the DDMS perspective to view a realtime log of what is happening on the device. Looking at the messages for the SiteWhere example application shows detailed information about the application connecting to and communicating with the MQTT broker. An example of what you might see is shown below:

Registering Your Device
One of the key actions taken in the example code is the call to registerDevice():
protected void onConnectedToSiteWhere() {
	Log.d(TAG, "Connected to SiteWhere.");
	try {
		registerDevice(getUniqueDeviceId(), "d2604433-e4eb-419b-97c7-88efe9b2cd41", null);
	} catch (SiteWhereMessagingException e) {
		Log.e(TAG, "Unable to send device registration.", e);
	}
}
This code generates a registration message to SiteWhere via MQTT which informs SiteWhere that a device wants to register (or verify registration) with the system. The two key pieces of information passed in the call are the unique device id (in this case the one discovered from the phone itself) and the token for the device specification (which tells SiteWhere what type of hardware it is talking to). SiteWhere checks whether there is a device with the given hardware id and, if not, creates one dynamically. When creating the device, it also creates an unassociated assignment which allows the device to start receiving events without needing to be associated with an asset. Sitewhere responds to the device registration request with a registration ack which is sent back to the device. The code that processes the ack is shown below:
public void handleRegistrationAck(Header header, RegistrationAck ack) {
switch (ack.getState()) {
case ALREADY_REGISTERED: {
Log.d(TAG, "Device was already registered.");
break;
}
case NEW_REGISTRATION: {
Log.d(TAG, "Device was registered successfully.");
break;
}
case REGISTRATION_ERROR: {
Log.d(TAG, "Error registering device. " + ack.getErrorType().name() + ": " + ack.getErrorMessage());
break;
}
}
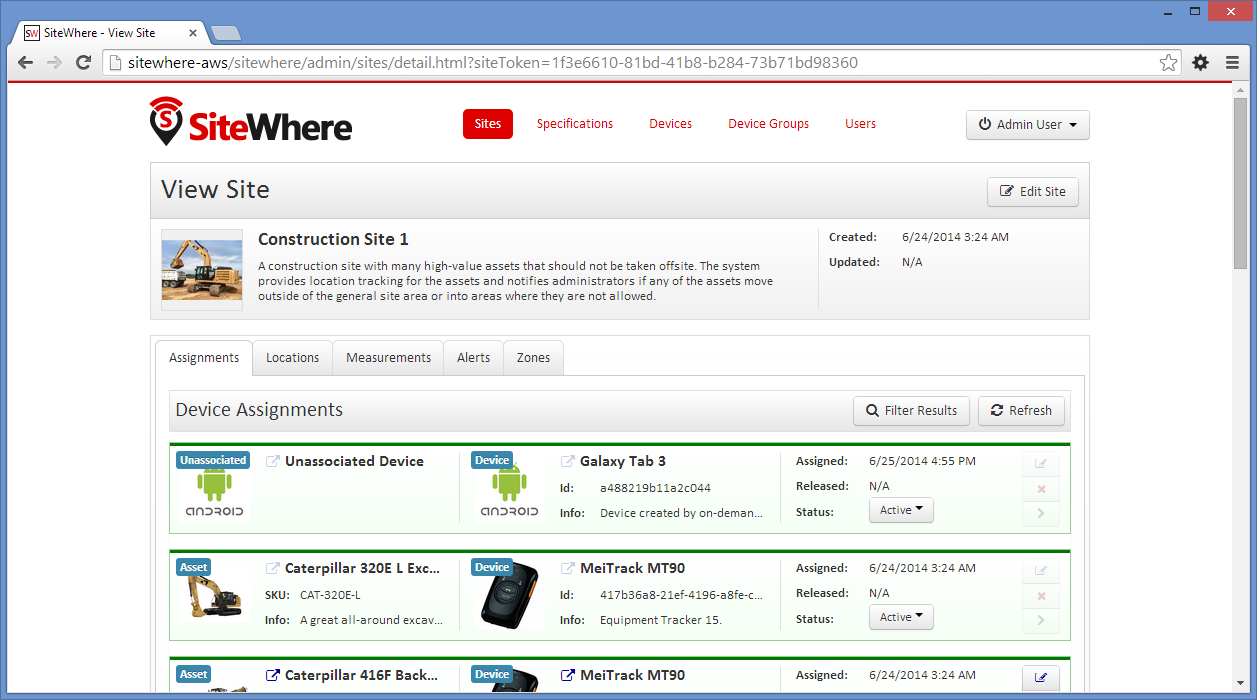
}The acknowledgement returns information about whether a new device was registered, there was an existing device for the hardware id, or there was an error in registration. The device can then act accordingly. On the SiteWhere side of things, the new device shows up in the list of device assignments once registration has completed:
Before sending events to SiteWhere, it is important that registration has completed. Otherwise, the events will be discarded since they do not reference a valid device.