Device Commands Tutorial
Device communication is one of the central features provided by SiteWhere. The communication engine allows SiteWhere to interact with connected devices using a powerful and highly configurable set of components. This tutorial will explain the basics of how SiteWhere device commands work including the concept of device specifications, the encoding and delivery of commands, how command responses are handled, and an example of creating a customized device agent that responds to commands.
Device Specifications
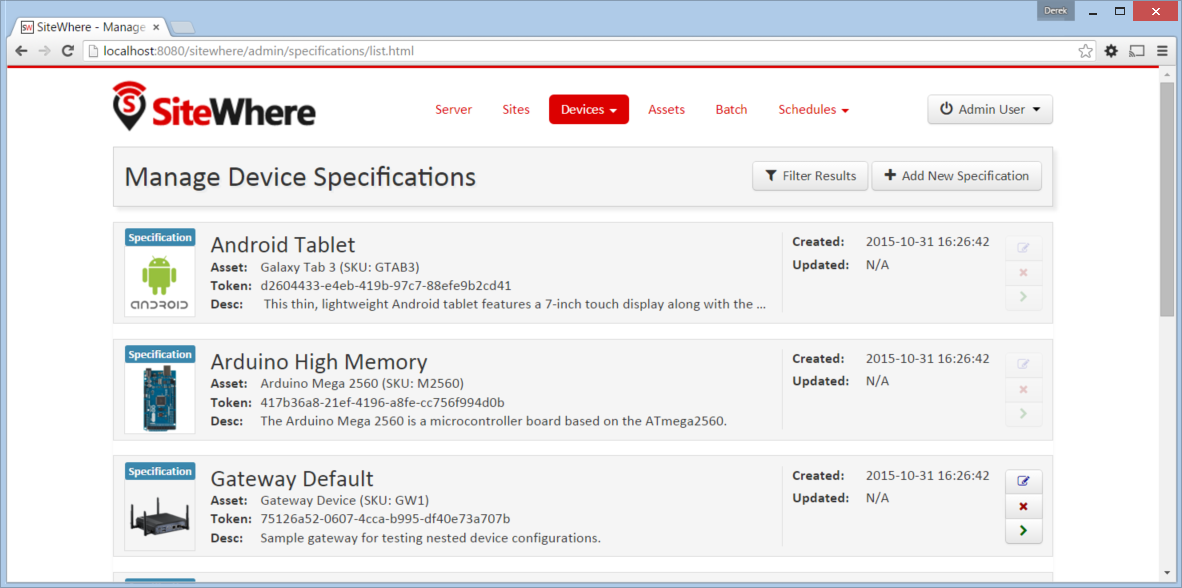
Device specifications contain information that pertains to a class of device hardware. For instance, if you have 5 different configurations for a given hardware platform, it makes sense to have a different specification for each. The specification defines some high level attributes such as the hardware asset type, but can also be customized with metadata and commands that are specific to a given configuration. In the SiteWhere administrative interface, there is a Specifications tab at the top of the page that allows you to view the existing specifications and create new ones:
Clicking on the green arrow beside a specification navigates to the detail page for that specification as shown below:
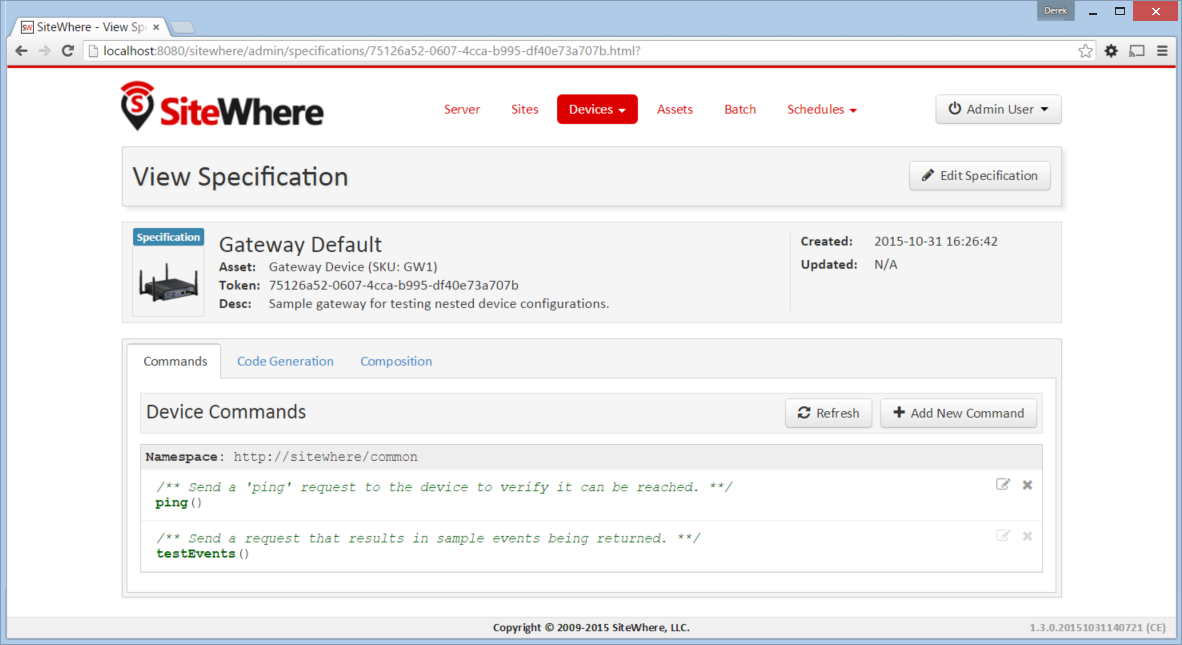
The banner at the top of the page indicates the type of asset with its associated name, description, and thumbnail image. There is also a Token field that contains a UUID which uniquely identifies the device specification. This value is used by devices on registration to indicate the type of hardware so that SiteWhere can properly interact with them.
Device Commands
Below the basic specification information is a list of Device Commands. Commands specify how SiteWhere can interact with the underlying hardware. A device command has a unique name, a namespace, and zero or more parameters. Device commands are intended to work in much the same way as calling an RPC method in a programming language. The command name and a list of strongly-typed parameters are encoded and sent to the device which interprets them and executes the corresponding logic. Each parameter has a name (which must be unique within the command), a type, and a flag indicating whether it is required. An example of the SiteWhere UI for editing commands is shown below:
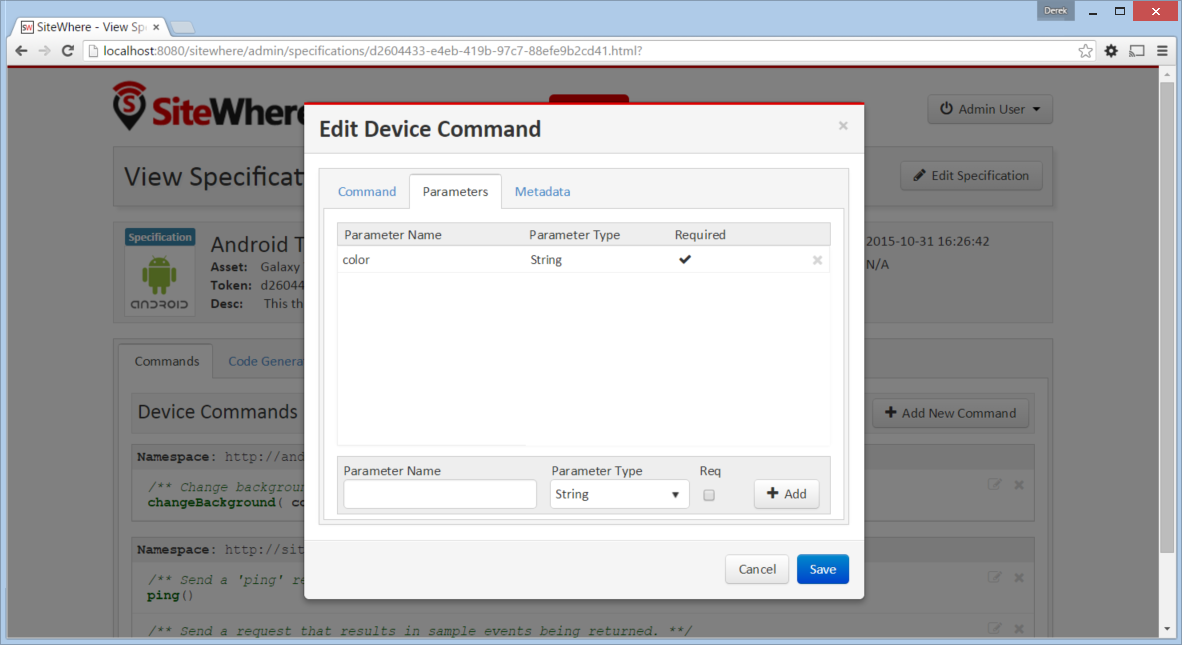
Parameter datatypes have been chosen based on the ones offered by Google Protocol Buffers. A full list of available datatypes and an explanation of what they represent can be found in the protocol buffer documentation for scalar types. Protocol buffers provide a prototyping language based on .proto files which can be used to generate bindings for most common languages. Rather than re-invent the wheel, SiteWhere uses protocol buffers as the default encoding mechanism when sending and receiving messages from connected devices.
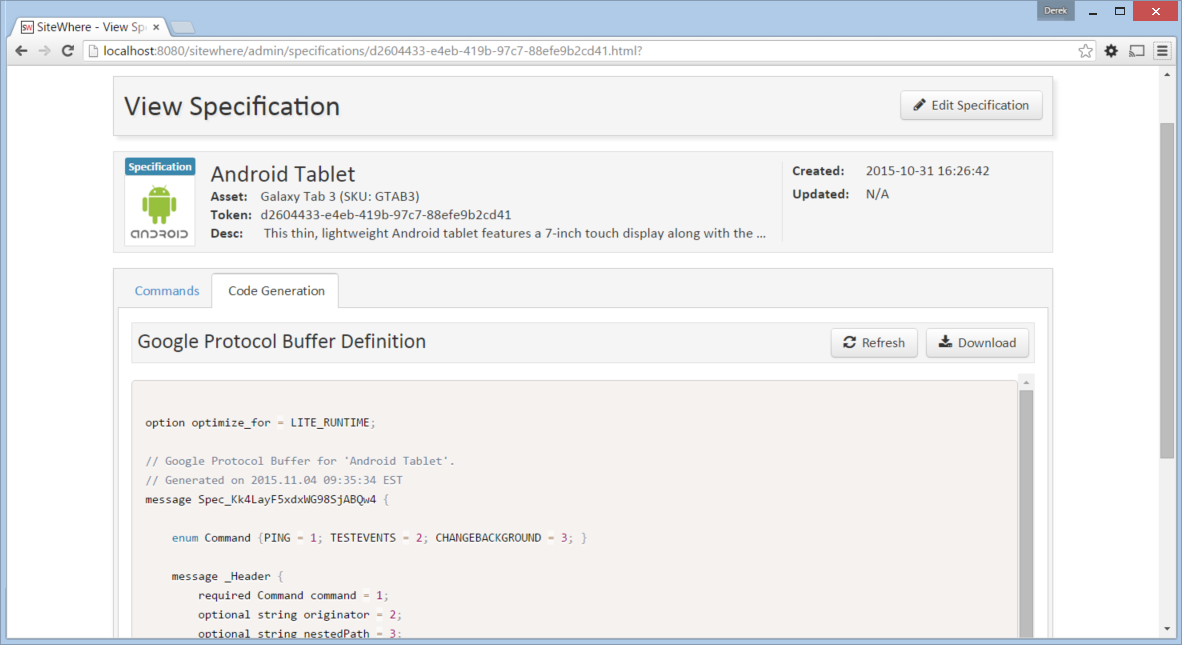
Protocol Buffer Code Generation
Clicking on the Code Generation tab on the specification detail page shows the protocol buffer definition that can be used to send the current commands. You can view a syntax-highlighted version of the .proto in the admin UI or download it to your local machine using the Download button at the top of the page. An example of the page is shown below:
As mentioned above, protocol buffers have been chosen as the default encoding mechanism for sending messages between SiteWhere and connected devices. The encoding (as well as most other communication elements) is pluggable, so you are not forced to use protocol buffers. Taking a look in the main configuration file found at conf/sitewhere/sitewhere-server.xml, browse down and you will find a section for configuring device communication. The outbound elements are shown below:
<sw:device-communication>

	<!-- Inbound elements removed -->

	<!-- Device command routing -->
	<sw:command-routing>
		<sw:specification-mapping-router defaultDestination="default">
		<sw:mapping specification="d2604433-e4eb-419b-97c7-88efe9b2cd41"
			destination="android"/>
		</sw:specification-mapping-router>
	</sw:command-routing>

	<!-- Outbound command destinations -->
	<sw:command-destinations>

		<!-- Delivers commands via MQTT -->
		<sw:mqtt-command-destination destinationId="default"
			hostname="localhost" port="1883">
			<sw:protobuf-command-encoder/>
			<sw:hardware-id-topic-extractor commandTopicExpr="SiteWhere/commands/%s"
				systemTopicExpr="SiteWhere/system/%s"/>
		</sw:mqtt-command-destination>

		<!-- Delivers commands via MQTT -->
		<sw:mqtt-command-destination destinationId="android"
			hostname="localhost" port="1883">
			<sw:java-protobuf-hybrid-encoder/>
			<sw:hardware-id-topic-extractor commandTopicExpr="Android/commands/%s"
				systemTopicExpr="SiteWhere/system/%s"/>
		</sw:mqtt-command-destination>

	</sw:command-destinations>

</sw:device-communication>
This block of configuration elements configures how SiteWhere sends commands to devices. The command-routing section contains a router that sends commands to destinations based on which device specification the device uses. Other routers can be plugged in if a different routing strategy is desired. In this case, all devices with the given specification token (Android specification from SiteWhere sample data) are routed to the command destination with desinationId android. All other commands are routed to the defaultDestination value which points to the default destination. Both destinations deliver commands over MQTT (using mqtt-command-destination). The difference between the two is the hardware-id-topic-extractor which is used to determine the MQTT topic names to deliver commands to. The android destination uses topics that start with Android while the default destination uses topics that start with SiteWhere. For MQTT destinations, there are two topics per device for sending commands, one for system commands and another for device specification commands. System commands include notifications such as registration responses while specification commands are the commands specific to the device.
Client Processing
Each connected device needs to be able to receive commands from SiteWhere and react to them. As mentioned earlier, SiteWhere allows you to use any transport or encoding you wish, but defaults to protocol buffers over MQTT. Using the .proto file generated by SiteWhere, you could manually generate bindings for any supported language, but it’s much easier to start with a reasonable scaffolding and just make the changes needed to implement the commands you need. SiteWhere offers a base Java agent project that provides a nice starting point for creating a custom Java client. Agents in other languages will be supported soon, but it’s not hard to develop one from scratch considering much of the code is generated for you. First, take a look at the following project on GitHub:
This project contains a module called sitewhere-java-agent which provides the scaffolding for a custom Java agent that can be executed from the command line of any platform that supports Java. In our example, we will be using a Raspberry Pi to communicate with SiteWhere in the cloud.
Download and Build the Agent
Before moving ahead, verify that you have the required development tools installed. You will need Eclipse and Maven installed as detailed in the development guide. Import the GitHub project for sitewhere-tools into Eclipse, then build it in Maven to make sure that the dependencies are downloaded. If the build is successful, a jar named sitewhere-java-agent-x.x.x.jar should be generated in the sitewhere-java-agent/target directory.
By default, the agent uses the .proto generated based on the Raspberrry Pi Default spec included in the SiteWhere sample data. To test the jar, copy it to the device you want to test from (this could be your local desktop or a device such as the Raspberry Pi). The jar contains everything needed to run the client, so it can be executed directly from the command line. It expects a file named config.properties to be located in the same directory as the jar. The propertes file contains the settings for the device hardware id, device specification token, and details about the location of your cloud instance of SiteWhere.
The default config.properties looks like below:
mqtt.hostname=sitewhere-aws
command.processor.classname=com.example.ExampleCommandProcessor
device.hardware.id=123-TEST-439829343897429
device.specification.token=7dfd6d63-5e8d-4380-be04-fc5c73801dfb
The default settings assume you are using the sample data included with SiteWhere and are running SiteWhere in the cloud as shown in the EC2 guide.
If you have not already started a local or cloud instance of SiteWhere, do so now. Details on starting a cloud instance can be found here.
Running the Agent
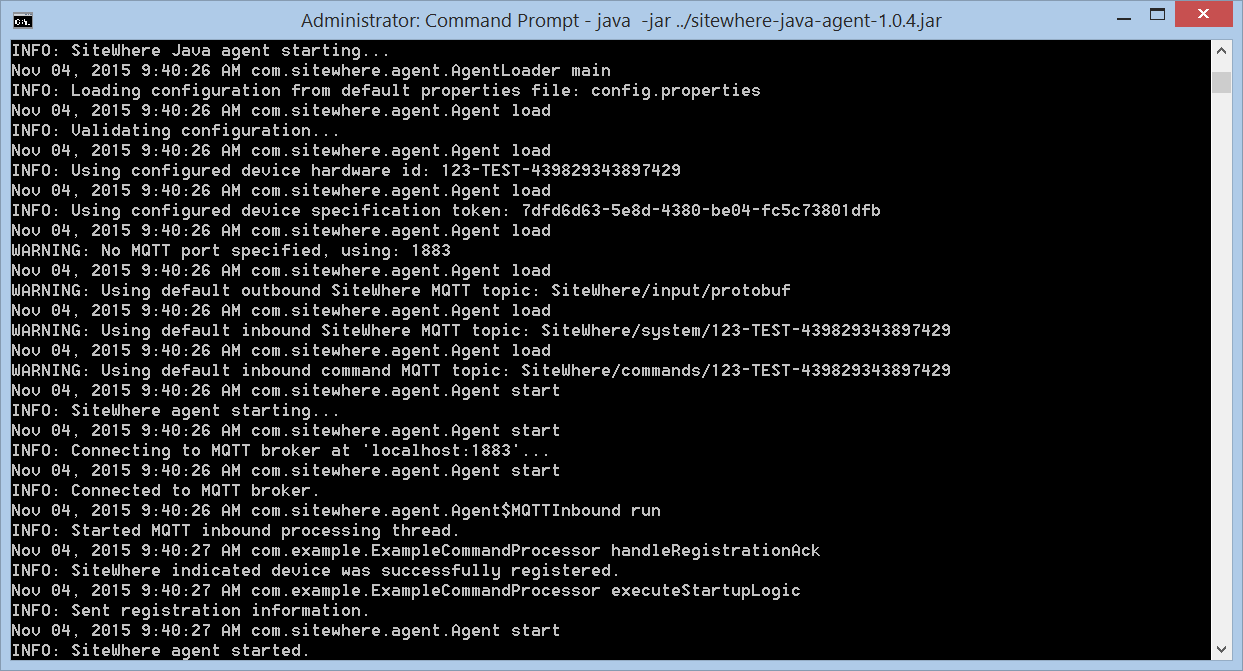
To run the agent, execute the following from the command line:
java -jar sitewhere-java-agent-x.x.x.jarAssuming the settings in config.properties are correct, the agent should connect to the remote SiteWhere instance via MQTT and register with the server. A response should be echoed to the console to indicate whether the device was already registered or not:
Invoking a Device Command
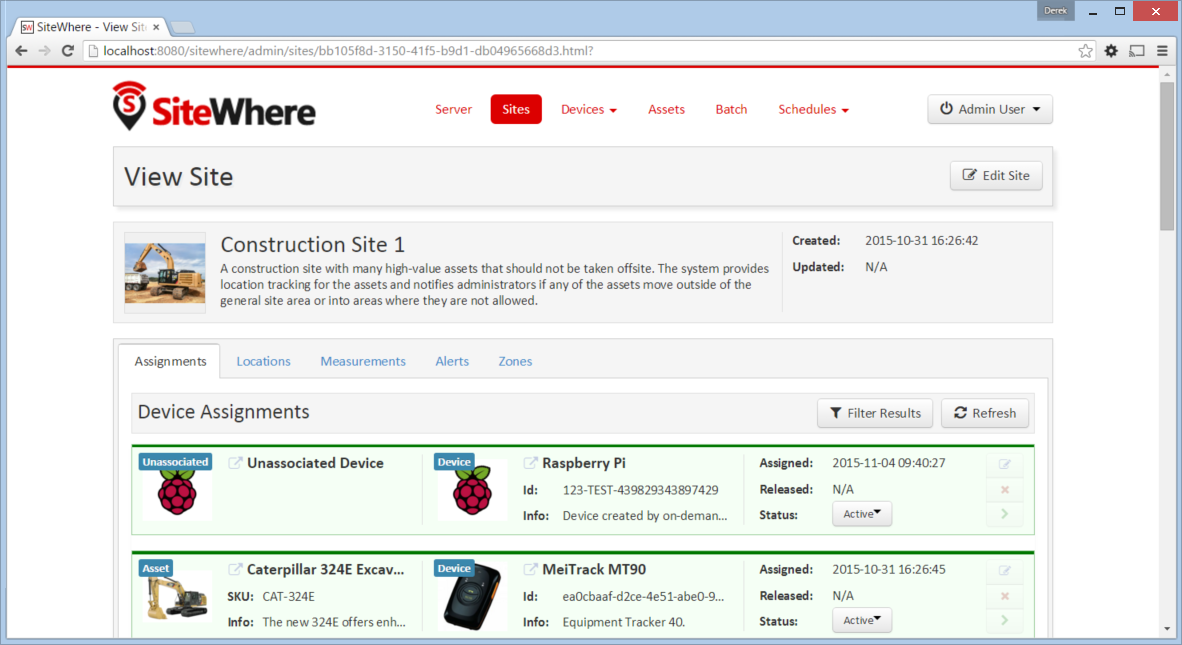
Now that the agent is running, go back to the SiteWhere admin UI, click on the Sites tab at the top of the page. Click the green arrow to navigate into the site detail page. There should be a new Unassociated Device entry in the assignments list as shown below. This is the device that was dynamically registered when the agent connected.
Click on the green arrow at the right of the entry for the unassociated device, which will navigate to the assignment detail page. Click on the Command Invocations tab at the top. Click the Invoke Command button to open the dialog and choose helloWorld from the dropdown of commands available.

Enter a greeting and check the checkbox for the loud parameter (which uppercases the response), then click the Invoke button to send the command to the device. You should see a new command invocation appear in the list for the assignment and you should see output in the agent console to indicate the command was invoked.
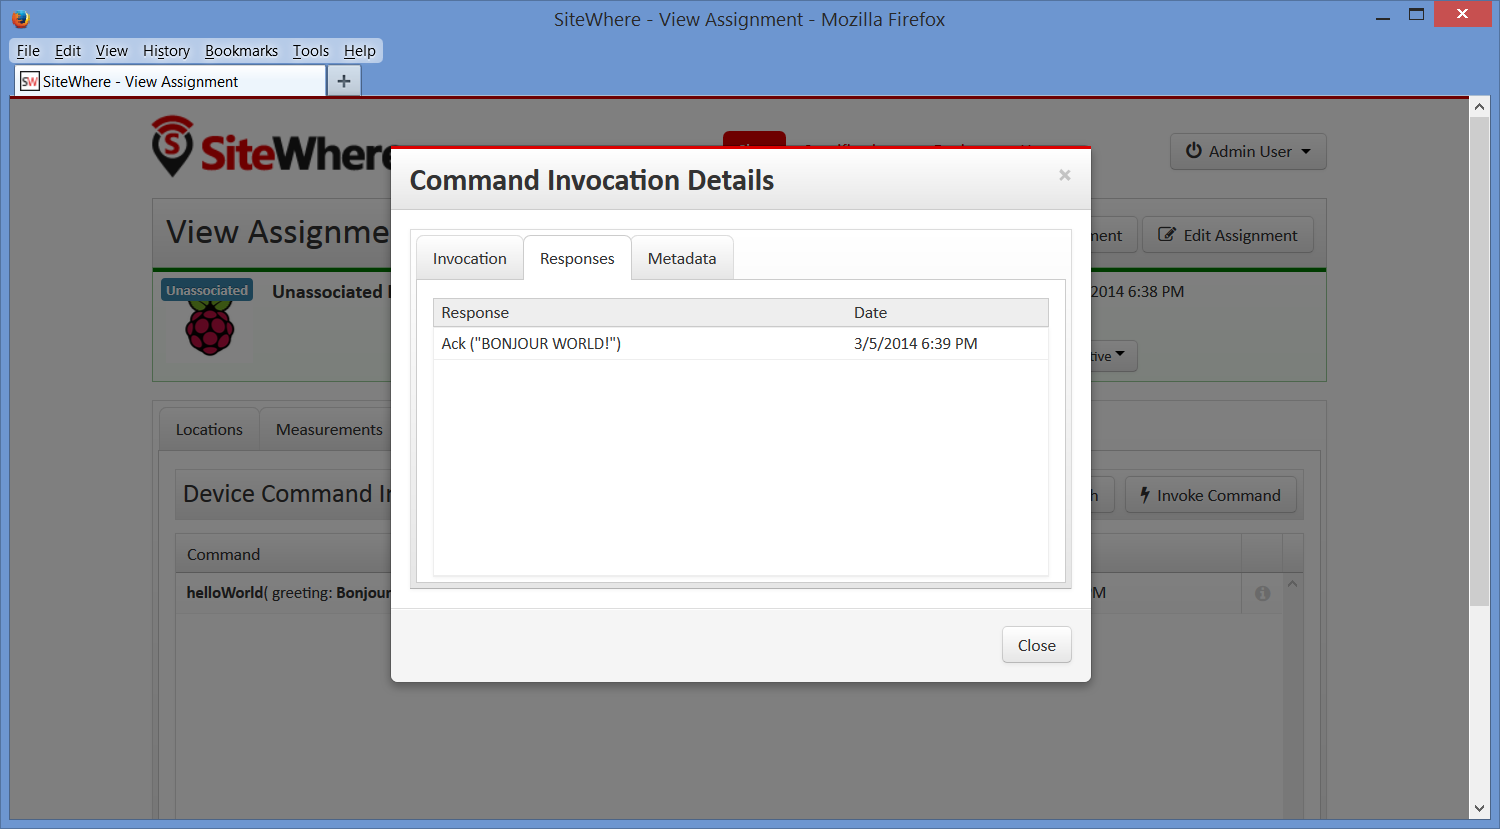
Command Response Handling
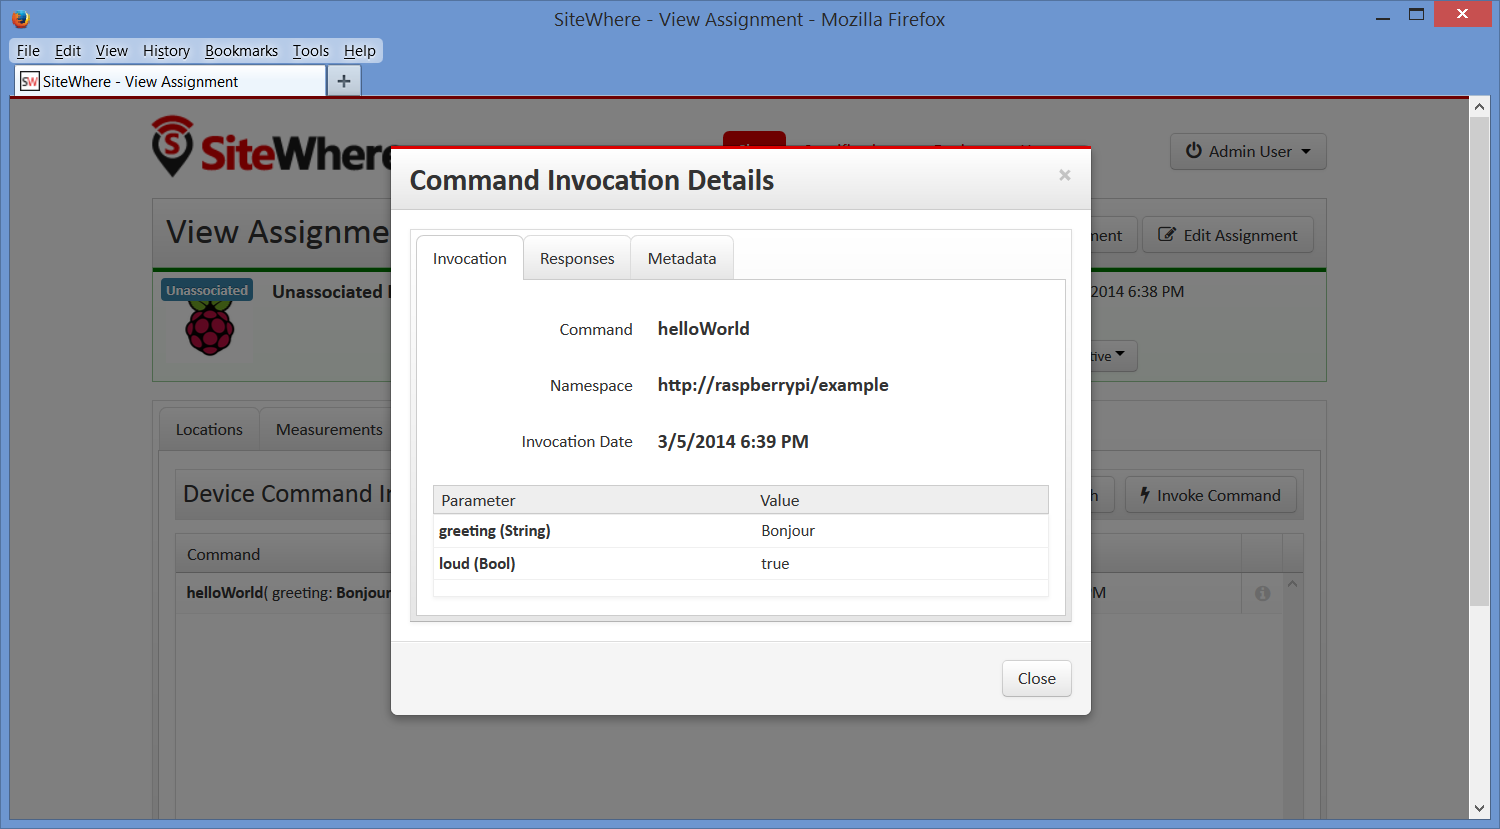
When a command is executed, the receiving device may issue a response to the command. This may be in the form of one of the standard device events – a location, alert, or measurements – or it can be an acknowledgement (ack). In the case of an ack, a message of the device’s choosing is sent back to SiteWhere. In any of the events, there is an optional originator field that may be passed. Commands coming in from SiteWhere pass the originating event id as part of the payload. If a response event passes that id in the originator field, the response will be associated with the original command invocation. If you look at the list of events for a device in the Command Invocations tab, there is an info icon at the right edge of each entry. Clicking on that icon will show details on the command that was invoked:
Clicking on the Responses tab shows any responses that have come in that were associated with the invocation: