
Mule AnyPoint Platform
Mule AnyPoint is a world class integration platform that makes it easy to integrate various technologies without having to write a lot of code. Mule has the concept of flows that pull in data from inbound endpoints, perform processing and decision logic, and route the resulting data to outbound endpoints. The AnyPoint platform includes out-of-the-box support for cloud connectors which allow flows to interact with many powerful cloud technologies such as Salesforce.com, Amazon S3, DropBox, Twitter, Google Calendars, and GitHub. For a full list, take a look at the connectors reference.
Install AnyPoint Studio
AnyPoint Studio is an Eclipse-based user interface that allows you to graphically create Mule flows and execute them locally. This makes it easy to assemble complex business logic and integration tasks in a short period of time. SiteWhere provides a plugin for AnyPoint Studio that allows your Mule flows to pull in SiteWhere data and integrate it with all of the other technologies Mule connects to. The rest of this document will help you get AnyPoint Studio and the SiteWhere plugin installed, then will explain how to use them.
Download AnyPoint Studio
Our first task is to get AnyPoint Studio installed. Since Studio is based on Eclipse, this is a very easy process. Basically we just download the archive and unpack it. First locate the latest version of AnyPoint Studio for your platform at:
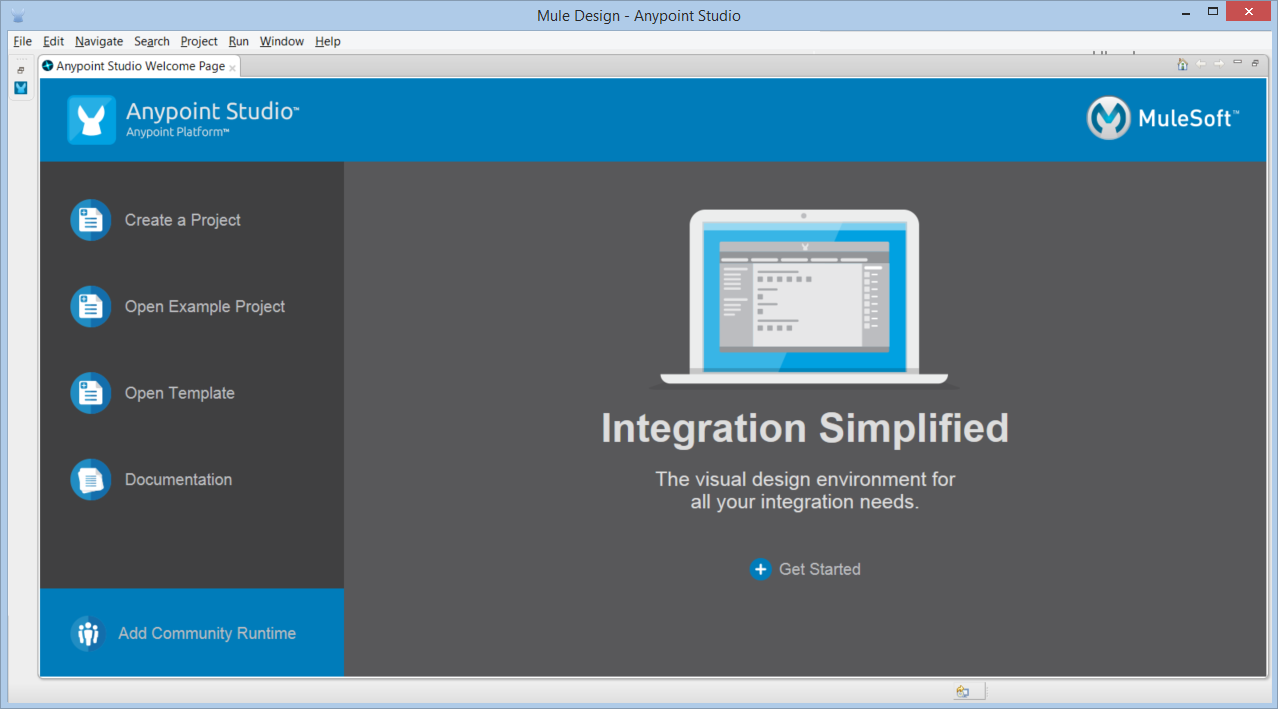
Once the file is downloaded (and yes, it’s a pretty large download), the next step is to unpack it and run the executable file in the root directory. Choose a workspace directory (the default is usually fine) and the Mule Studio welcome screen should come up as shown below:
In order to make sure that you have the very latest components, it’s a good idea to check for platform updates that have been published since your Mule Studio installation was released. If you click on Help > Check for Updates and then follow the wizard, the latest plugins will automatically be installed.
Install SiteWhere Connector
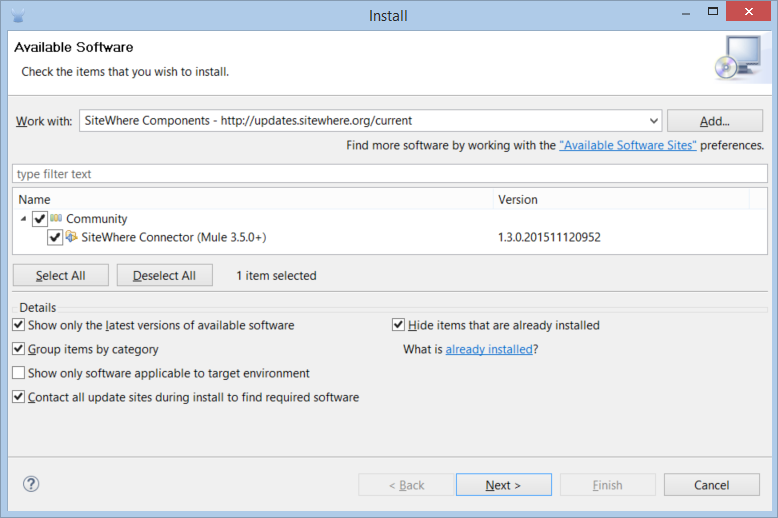
Now that we have a base installation of AnyPoint Studio, we need to install the SiteWhere Connector plugin. To install the SiteWhere components, click Help > Install New Software…, then click the Add… button near the top of the page and enter SiteWhere Components in the Name field and http://updates.sitewhere.org/current in the Location field. The screen should look like below:

Click OK to add the new software site. Mule Studio will download information from the site and a tree will appear for the available components. Check the top checkbox to download the components. See the image below for an example of what you should see:
Keep clicking Next until you reach the end of the wizard. You will need to agree to the license agreement (CPAL) and will need to ok a message about unsigned content. Click Finish to complete the wizard and allow Mule Studio to restart when it asks. When Mule Studio restarts click Help > About Mule Studio…, then click Installation Details. There should be an entry for SiteWhere Connector (Mule 3.5.0+) in the list. If you see the entry, you are ready to start using SiteWhere with Mule!
Install Community Edition Runtime
Currently, SiteWhere does not work with the Mule EE runtime due to a conflict with the versions of Hazelcast used. It’s not a problem though, since Studio allows you to download other Mule runtimes to execute against. Choose Help > Install New Software and use the dropdown near the top to choose Mule ESB Runtimes for AnyPoint Studio. After the tree appears, choose an entry for the AnyPoint Studio Community Runtimes section as shown below:

As with the SiteWhere plugin, follow the wizard and allow Mule Studio to restart. You should now be ready to start working with SiteWhere data in Mule!
Create a Mule Project
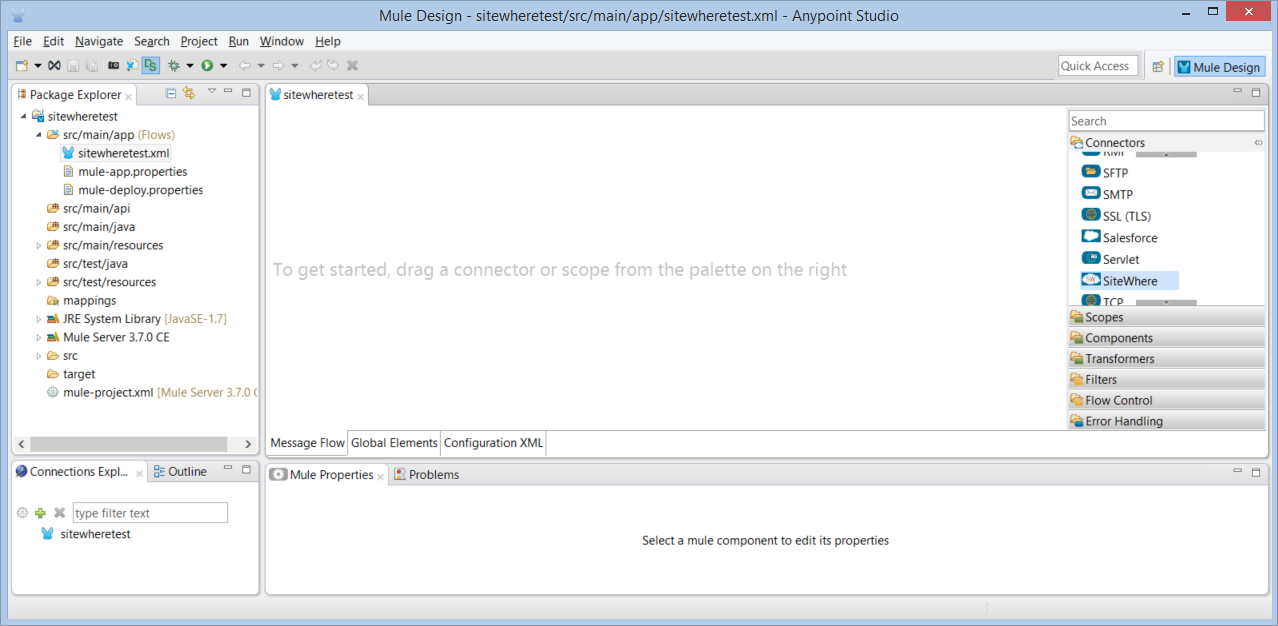
Now that the SiteWhere plugin is installed, we can create a test project to demonstrate receiving events from a running SiteWhere instance. To create a new project click File > New > Mule Project. Type SiteWhereTest as the project name and make sure to check the CE runtime, then leave the rest of fields with default values and click Finish to create the project (if you still have the welcome page up, you may have to close it to see the new project). The screen should look like the one below:
Add a SiteWhere Configuration
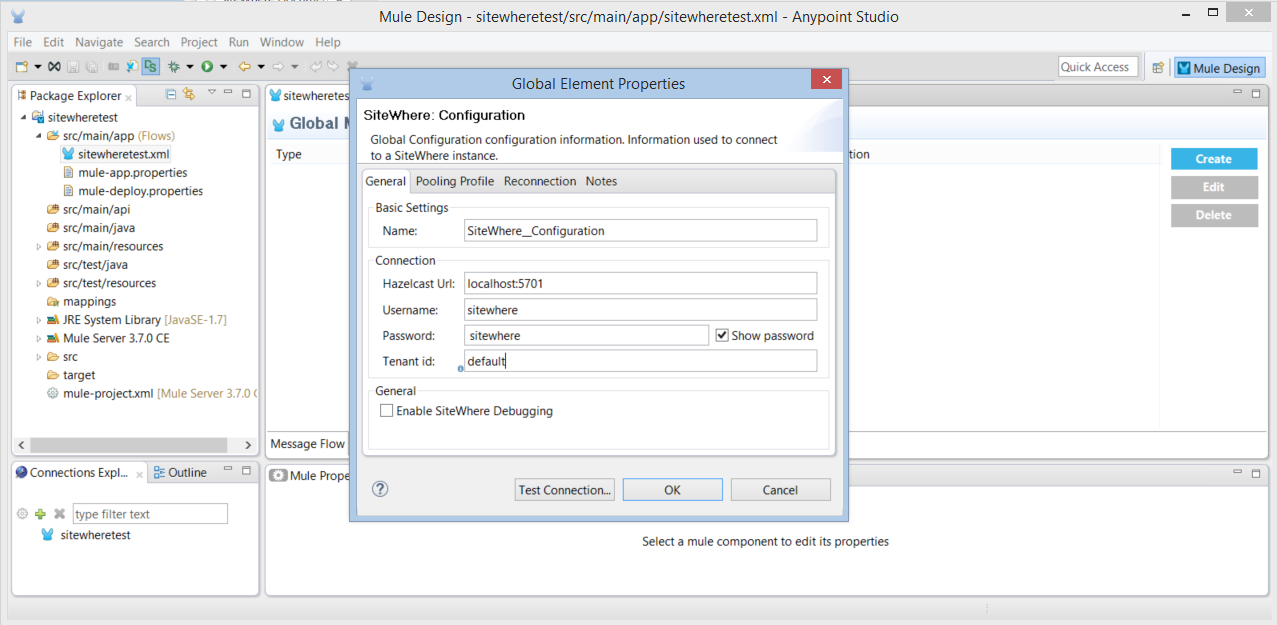
There is a global element that controls SiteWhere configuration for a flow. In the flow editor (the large area in the middle of the IDE), click on the Global Elements tab and click the Create button on the right side. In the dialog, open the Connector Configuration node and choose the SiteWhere: Configuration entry, then click OK. You should now see the SiteWhere settings dialog filled in with the default values. In this tutorial, we are going to assume you are running on a local instance of SiteWhere. If you are running on a cloud instance, update the Hazelcast Url to the correct cloud URL. You will also need to enter the Hazelcast username and password based on the group name and password set in your hazelcast.xml configiration file. The default values are sitewhere / sitewhere. The values should look like below:
Once the settings have been updated, click the Test Connection… button at the bottom of the dialog to verify that Studio can connect to SiteWhere. If the connection succeeds, your flow is ready to start interacting with SiteWhere data.
Create an Event Processing Flow
Now that we have the SiteWhere configuration out of the way, we need to add the processing elements to our flow to get the data we are interested in from SiteWhere. In this example, we want to subscribe to any location events being processed by SiteWhere. As devices report new location data, that data will be forwarded to Mule after it has been saved to the datastore by SiteWhere.
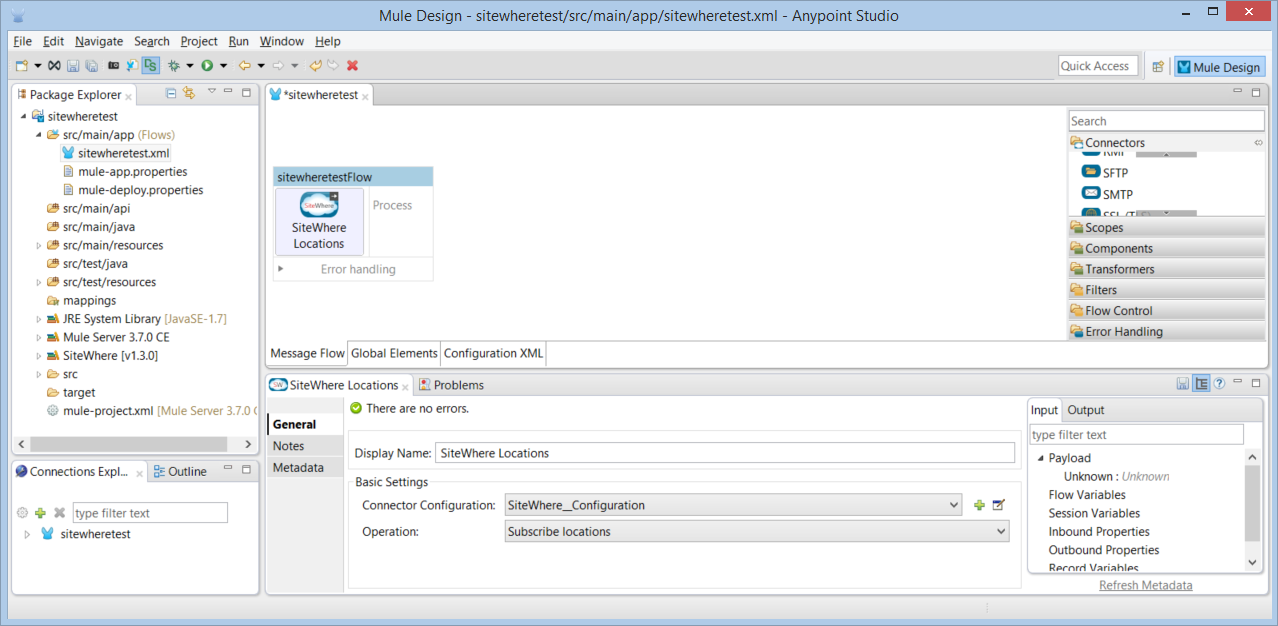
First, click on the Message Flow tab at the bottom of the editor to go back to the visual editor. On the palette at the right of the editor, open the Connectors drawer, find SiteWhere in the list, and drag-and-drop it out on to the canvas. A new inbound endpoint will be added. Clicking on the new node should show its details in the properties panel at the bottom of the editor. Change the display name of the node from SiteWhere (Streaming) to SiteWhere Locations, then open the dropdown for Connector Configuration and choose SiteWhere_Configuration (which is a reference to the configuration we created in the last step). Finally, choose Subscribe locations from the Operation dropdown and save your changes.
Your flow should now look like the one below:
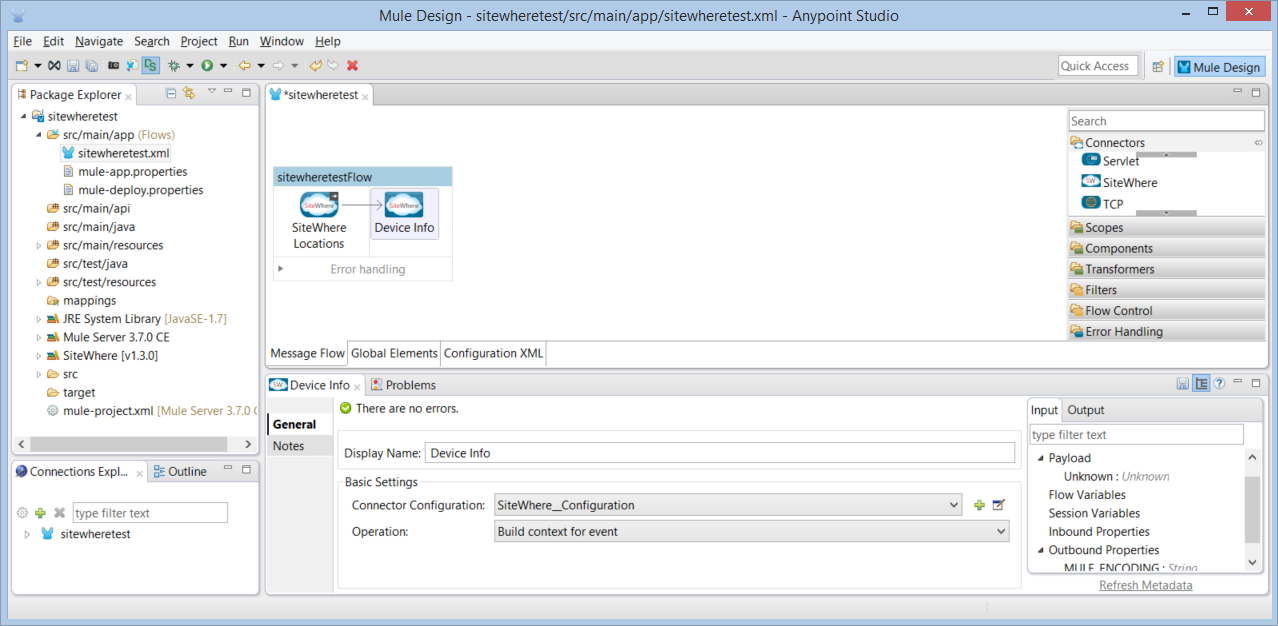
The next step is to show the information we are reading in so that we can tell the flow is working. By default, only very basic information for the SiteWhere event is sent over the wire. It doesn’t include all of the details about the device the event belongs to. There is a node in the SiteWhere cloud connector that will get the extra information from SiteWhere for us. From the palette on the right, drag the SiteWhere cloud connector on to the canvas, positioning inside the dotted outline for the flow and directly to the right of the existing endpoint. An icon hint will appear at the right edge of the endpoint if you are in the right place. Now drop the new element and it should appear as a new node connected to the right of the endpoint (if not, delete it and try again). Click on the new node and look at the properties panel at the bottom of the editor. Change the Display Name to Device Info and choose the existing configuration reference from the dropdown. Choose Build context for event as the operation. Now your flow should look like below:
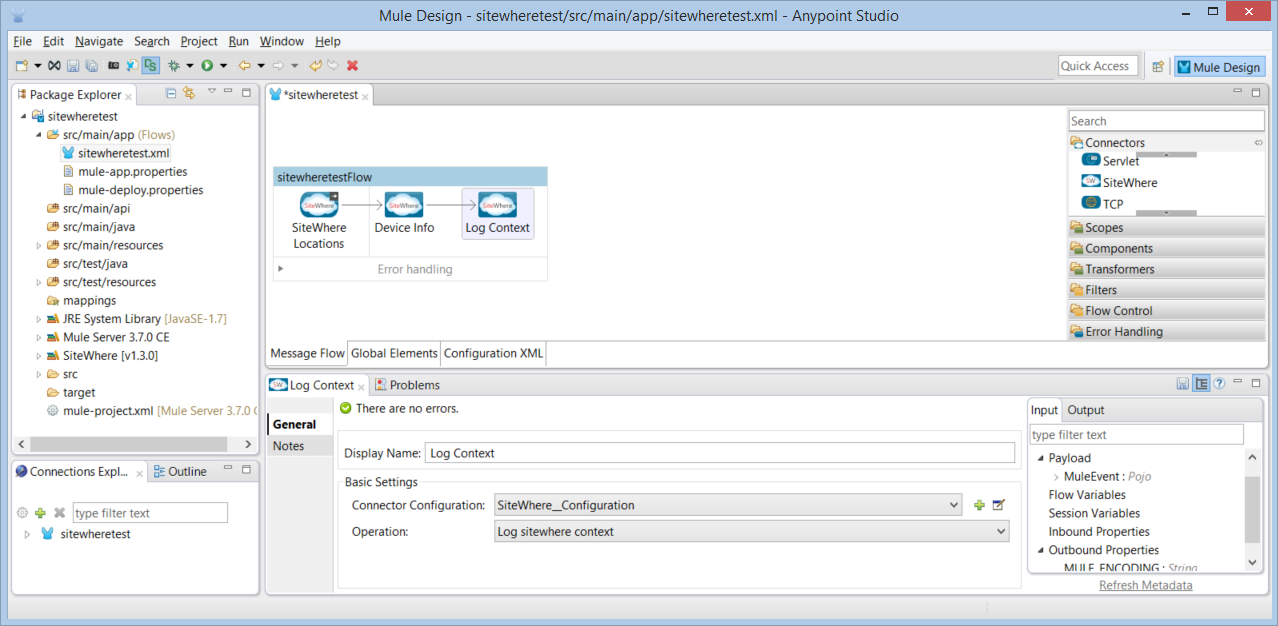
The final step in the process is to print out the context that has been created. SiteWhere has the concept of a conatiner that holds device events, their device information, and current assignment all in one neat package called a SiteWhere context. We can print the context to the AnyPoint Studio log by adding one more node to the flow. From the palette on the right of the editor drag another SiteWhere node out to the right of the Device Info node. If done correctly, there should now be three nodes connected in series. Click on the new node and look at the properties editor at the bottom. Edit the Display Name to be Log Context and choose SiteWhere_Configuration as the connector configuration. Finally, change the operation to Log sitewhere context and save the flow. It should now look like the one below:
That’s it for our first flow! Now we can run it and see some data flow through the system.
Run Your Mule Flow
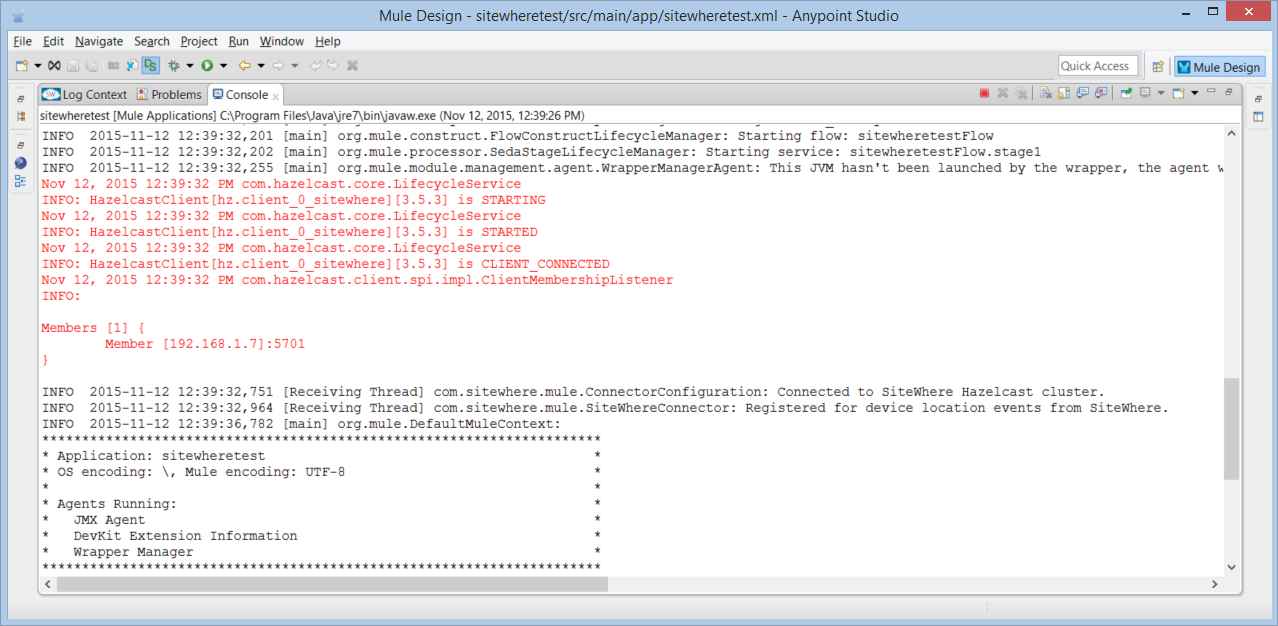
To run the flow you just created, look at the Package Explorer view on the left side of the editor. The sitewheretest.mflow file should already be highlighted. Right click on the mflow file to open the context menu and choose Run As > Mule Application. If all goes well, a console window should show up with the log from the newly started Mule instance running our flow. Maximize the tab to take a better look at the console. You should see log messages to indicate the system has started and has connected to your remote SiteWhere server (if not, make sure your cloud server is running and properly configured). The console window will look like the one below:
Test with Sample Data
Next, we can send some sample data through the system to have it show up in Studio. Normally, the data would come from a device connected to SiteWhere, but for the sake of simplicity in this tutorial, we will use emulated data. Luckliy, the SiteWhere administrative application has a built-in emulator that can send test data to any registered device.
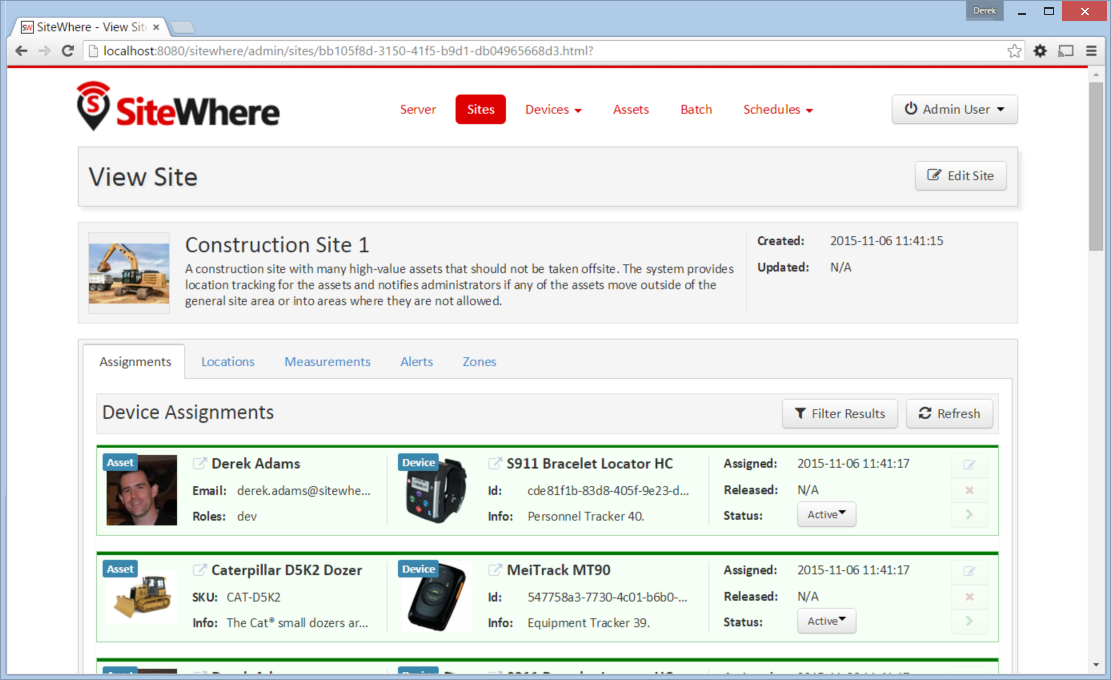
Log in to the administrative application and click on the Sites tab. Click the green arrow at the right of the Construction Site 1 entry (assuming you are using the default sample data). This will open the detail page for our make-believe contruction site. It will look something like the page below (depending on which release is running, the sample data may look different):
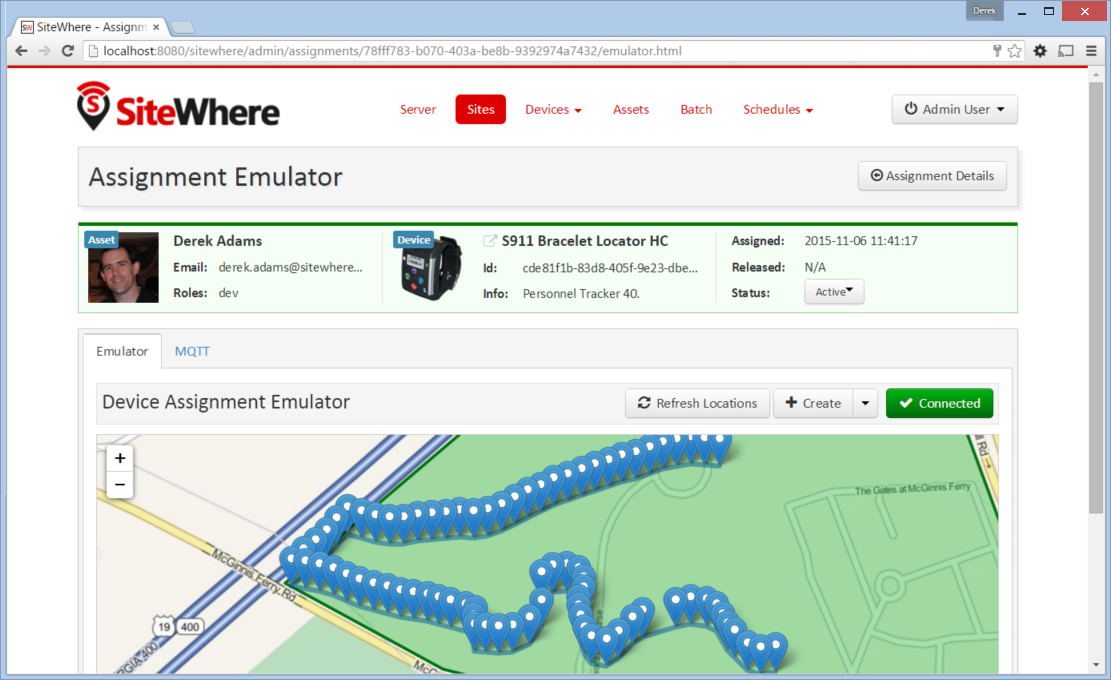
Now click the green arrow to the right of the first device assignment in the list, which will open the View Assignment page. At the top of the page there is an Emulate Assignment button. Click the button to open the assignment emulator. By default, the emulator is not connected to SiteWhere. Clicking the Connect button above the map will establish an MQTT connection from your browser to the MQTT broker SiteWhere is using for event input. If the connection has been established, the button will turn green and its text will show as Connected as shown below:
Finally, we can add a new location to the list. Clicking Refresh Locations will center the map on the last known location of the device (it should already be centered there). Click the zoom button on the map a few times to zoom in on the point. Click on the point where you want to create the new location. A dialog will open with the new location information:

Click Create and a new location should show up on the map (there is a slight delay because the call is async and the browser waits a couple of seconds before refreshing the map). If you swap back from the browser to your Mule Studio instance, you should notice new data has shown up in the console (and a lot of it). The data is a dump of the SiteWhere context including the current device assignment and the newly added location. It will look something like the screen below:

Next Steps
In this tutorial we have installed AnyPoint Studio and the SiteWhere plugin. We created a new Mule project and a flow that subscribes to location events that SiteWhere produces. We ran a live instance of the Mule server in Studio and, from an emulator in the SiteWhere admin console, created location information. The information was sent from th browser via MQTT to SiteWhere which stored the location (you can look at the locations log to verify that it was stored). The location event was then sent via Hazelcast to your Mule flow which subscribed to location events. Finally, the flow printed the complete SiteWhere event context to the Mule log.
This is only a simple example of event processing. In the real world, we would be talking to real devices over the SiteWhere communication engine. From a Mule perspective, the event processing side of things is no differentfor real device data than it was for the emulator. In Mule, we could take the location data and do interesting things with it. For instance, we can take the SiteWhere location data and forward it to SalesForce or another cloud provider. Integration with AnyPoint Studio opens hundreds of new possibilities for using your SiteWhere data!